As a System Admin, you can organize your users with Groups. These groups are created in the 'Groups' tab of the Management Panel and act as a way to better organize and separate coaching and interaction capability within your system. Users can only communicate and share with other people within their assigned group(s). Regardless of group placement, they can still communicate with all Admins in their system.
System Admins may want to group users based on school, grade level, content area, or whatever else works for your organization! You can create as many groups as you want, and users can be in multiple groups at a time.
Contents:
III. Assigning Groups To New Users
IV. Assigning Groups To Existing Users
Default Group Placement
- Admins are granted All Groups access throughout the system and do not need to be placed into any one specific group.
- Mentees and Coaches are placed into the Default Group if no other group designation is made for them.
Creating Groups
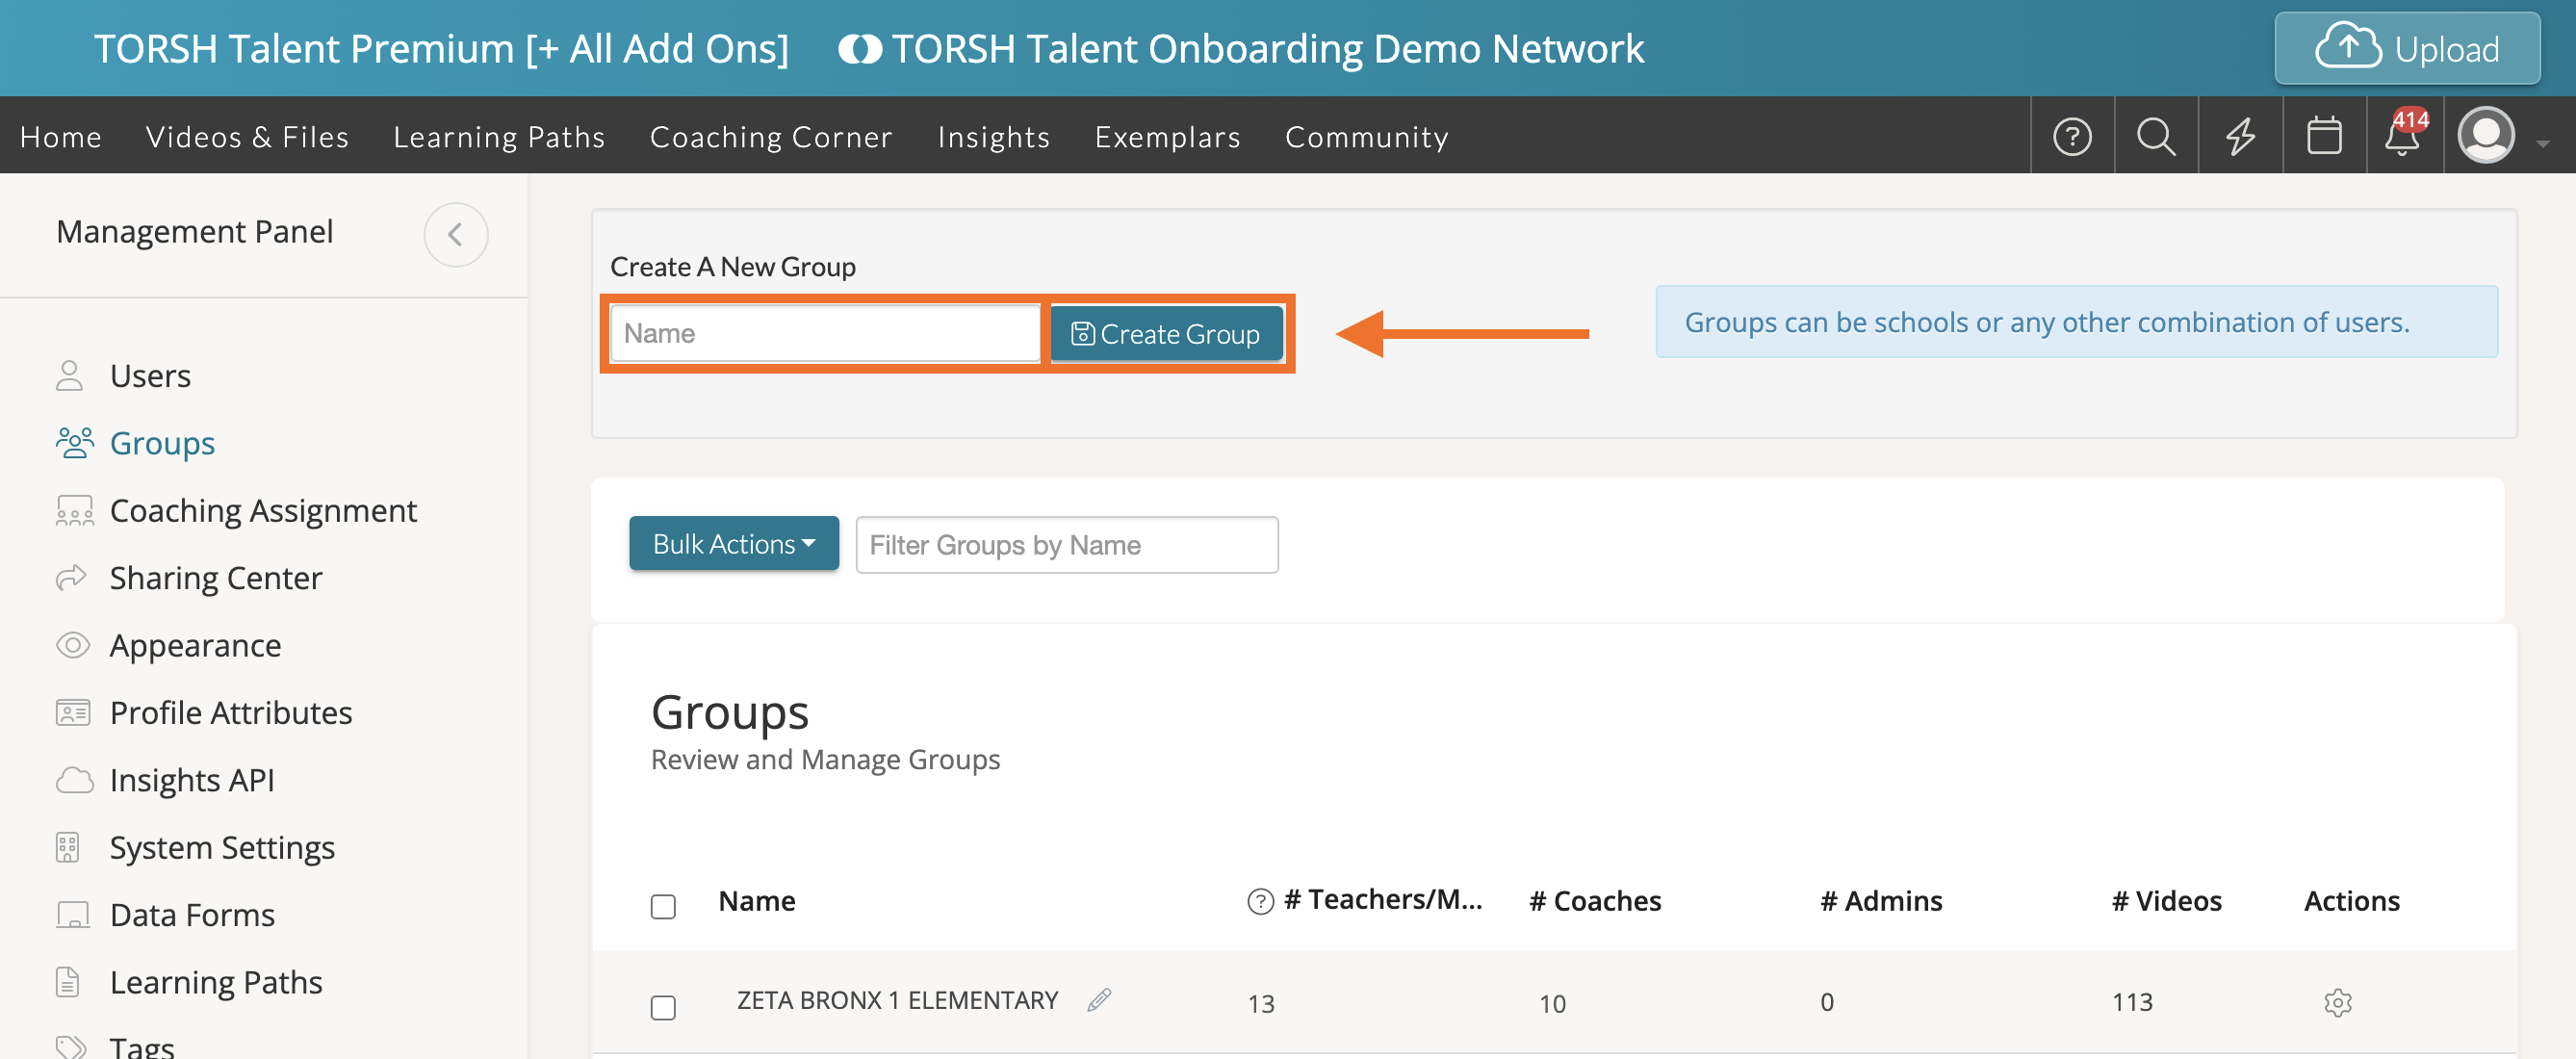
We generally suggest the workflow of creating groups before inviting users . To create a new Group, first click 'Groups' on the Management Panel on your homepage.

Once on the Groups page, simply type in the name of the group you want to create in the provided space. When you are done typing, click the blue 'Create Group' button.
Once the group is created, it will live in the 'Groups' list where you can then modify its membership as needed. To change the name of the group, simply click on the 'pencil icon' next to the group's name, and type in the desired name. Click the 'checkmark button' when you are done to save your changes. To delete the group, hover over the 'gear icon' and select 'Delete.'
To modify the members in the group, hover over the 'gear icon' and click 'Modify.'

A new page will open up where you can 'Remove' and 'Add' members. To do so, click on the checkbox next to the specific member(s) you would like to add or remove and then select 'Add' or 'Remove' to add them to the 'Members' or 'Non-Members' list. Click 'Apply' to save your changes.

Assigning Groups To New Users
When you invite mentees or coaches to use TORSH Talent, you can also add them to a group via the 'Invite New Users' tool in the Users Management page. From there, you can designate specific group placement under the 'Groups' column dropdown menu.

Assigning Groups To Existing Users
If you already invited your users and wish to organize them in groups after the fact, you can do so via the Users Management or the Groups page of your Management Panel.
I. Assigning Groups via the Groups Tool
You can add or remove users from groups from the Group tab of the Management Panel. To modify the members in the group, hover over the 'gear icon' of the group listing here and click 'Modify.'

A new page will open up where you can 'Remove' and 'Add' members. To do so, click on the checkbox next to the specific member(s) you would like to add or remove and then select 'Add' or 'Remove' to add them to the 'Members' or 'Non-Members' list. Click 'Apply' to save your changes.

II. Assigning Groups Individually Via Users Management
You can also modify Group membership within the Users Management tab of the Management Panel. To do so, first find the specific user you would like to place into a group. Next, hover over the 'gear icon' on the right-hand side of the user listing. Then select 'Edit User.' This will load the Edit User pop-up.
From there, find the 'Groups' section of the user pop-up and click on its 'pencil icon' to make changes. You can then search for, add, or remove group placement as desired for this specific user. Click the 'checkmark' icon to save your changes.
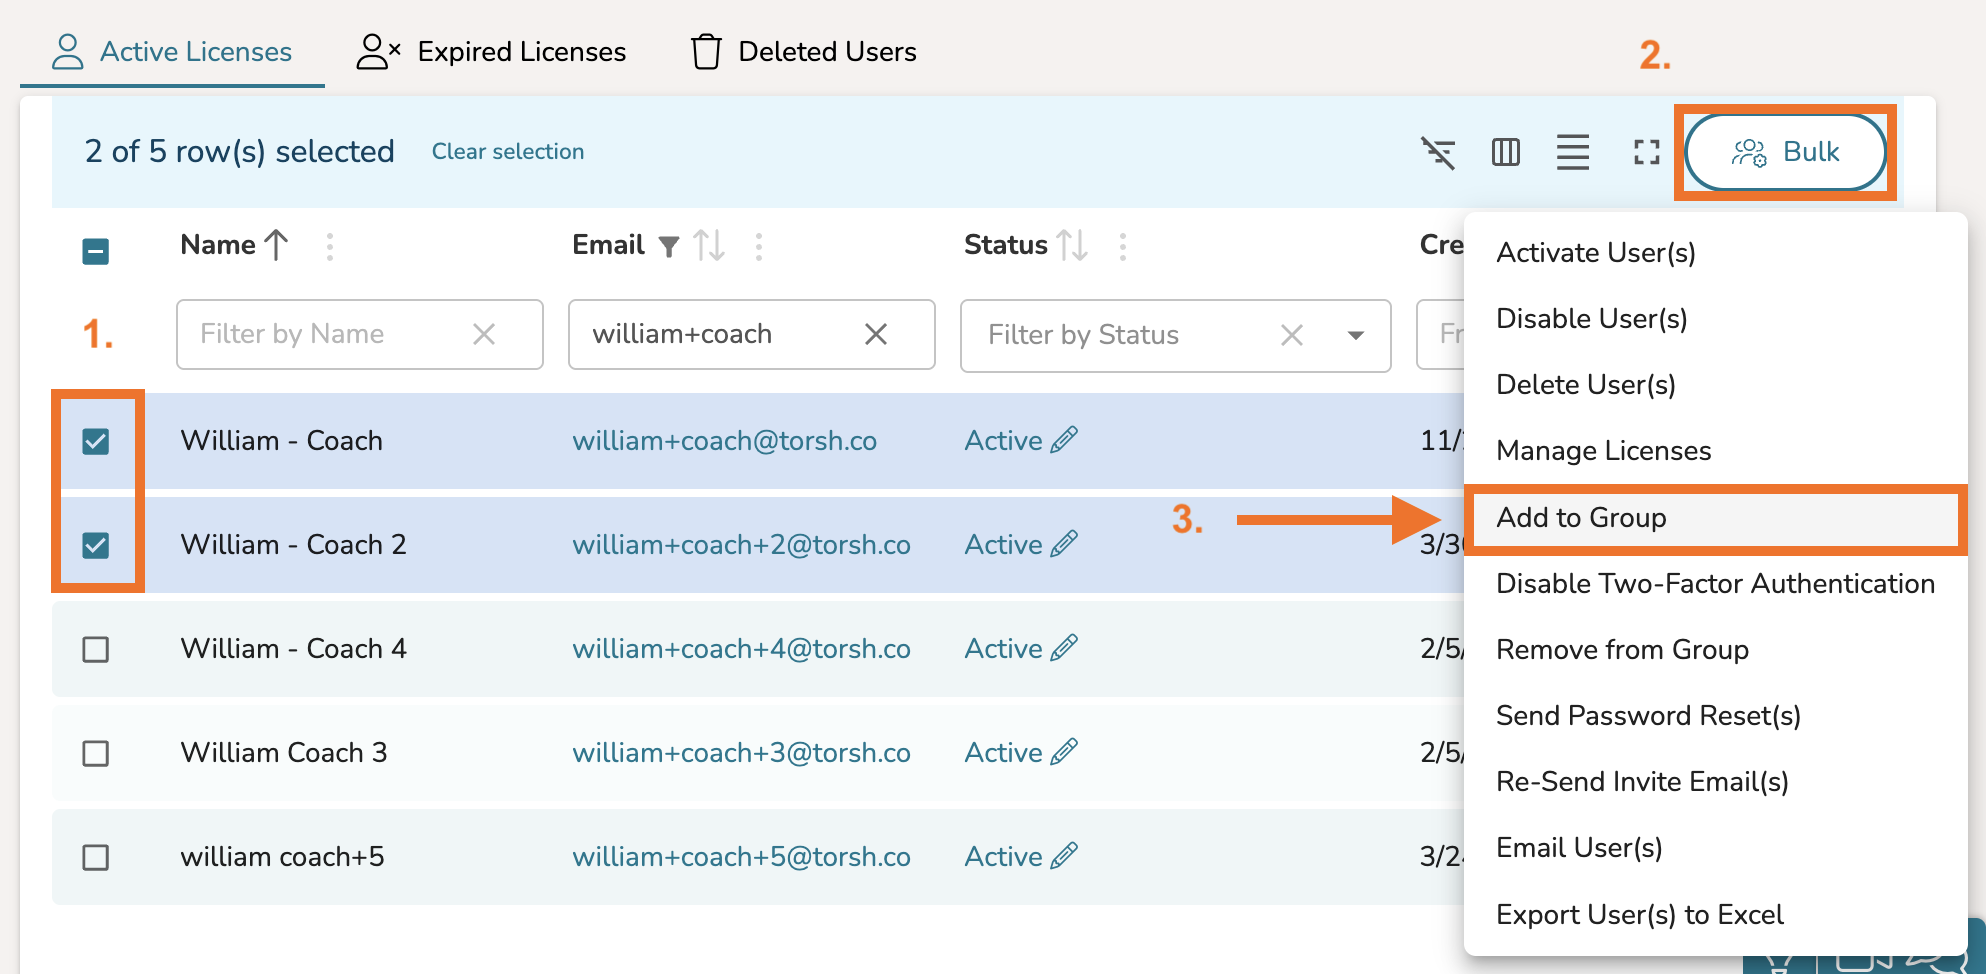
III. Assigning Groups in Bulk Via Users Management
Lastly, you can also modify Group membership in bulk via the Users Management tab. To do so, first select the specific users you would like to place into a group. Next, click on the the 'Bulk' action button in the top, right-hand corner of the table and select the 'Add to Group' option.
From here, you can also use the 'Remove from Group' option to remove selected users from specific groups.