After you have created a page in your Learning Path module, add a section by clicking the 'Add Section' button.

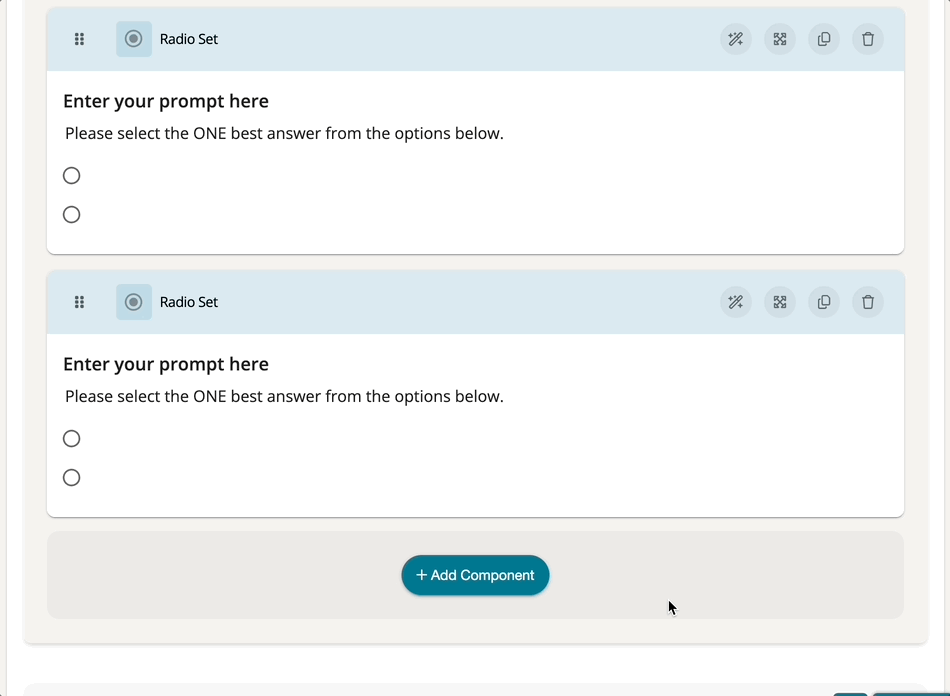
Within each section you can click the 'Add Component' button to add various components that your learners can interact with!

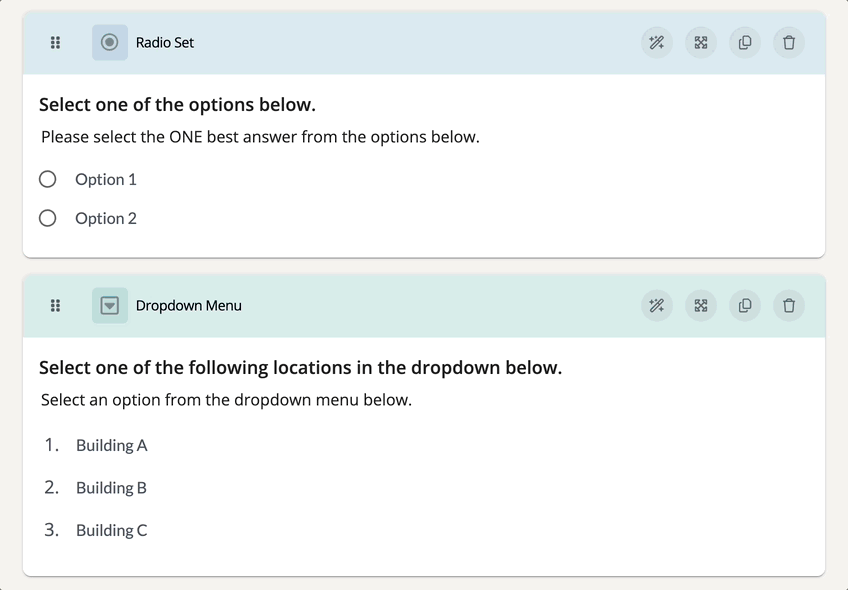
Within each section of a Learning Path module, you can add the following components:

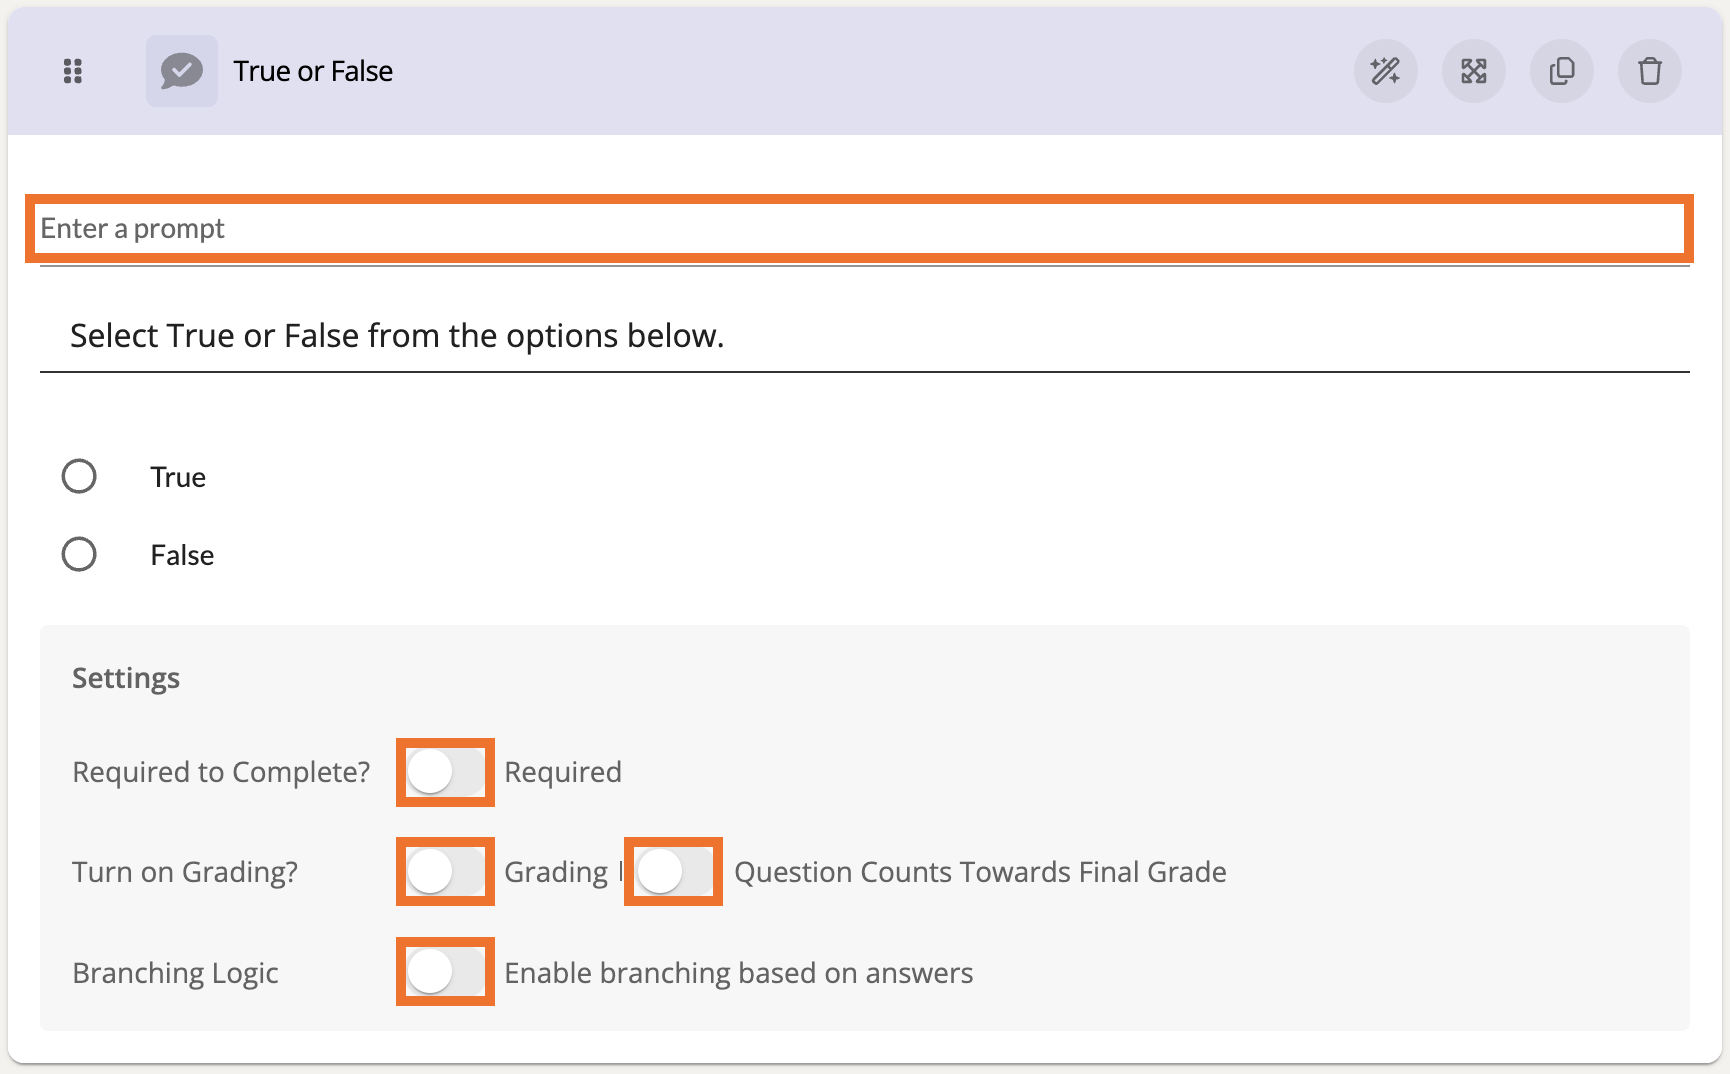
In the top, right-hand corner of each component you can add, you can further adjust it as needed with some general settings.

- To switch from one component type to another, click the 'switch icon.'

- To expand a component to see its edit options, click the 'expand icon.'

- To duplicate a component, click the 'duplicate icon.'

- To delete a component, click the 'trash bin icon.'

In order to adjust the display and look of a component, simply click in its general preview answer area, and the component will expand to show settings that allow you to manage the title, description and answer choices the users of your system will see!
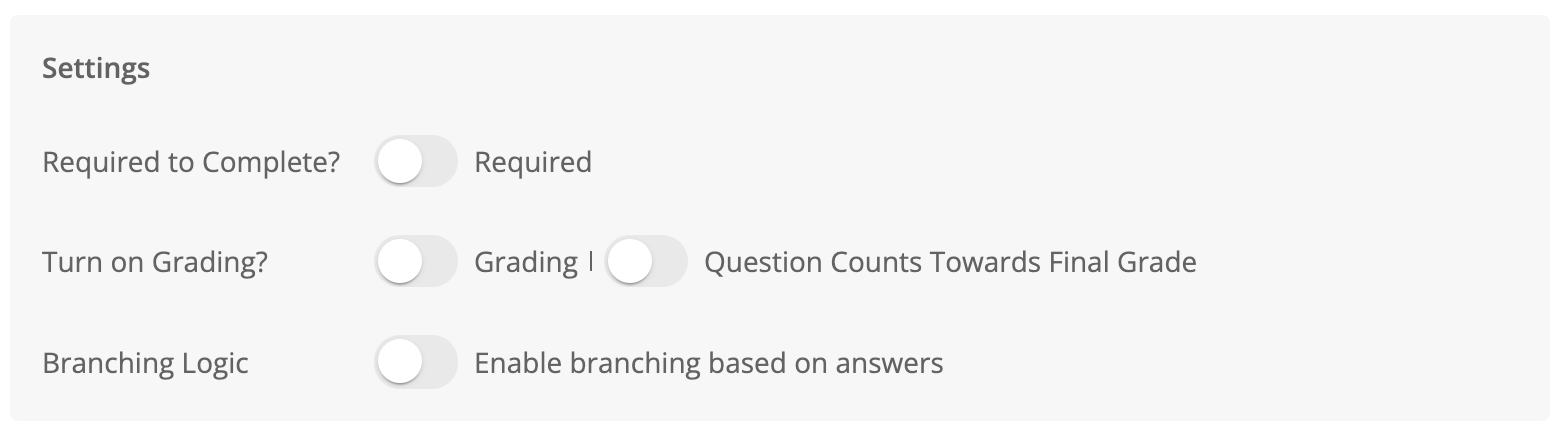
For most Selection Option components, you can designate it to be required, enable it for grading, count the question toward the final grade of the module, and enable Branching Logic .
Embed Video
The Embed Video component allows users to watch an embedded video that is required for viewing in order to progress through the module. This is especially useful in situations wherein supplementary training is provided through the video, and quiz questions need to be accessed after the fact. If you do not mark the component as required, it can still be a useful tool for embedding a singular video to be accessed within the module!
When all settings of the Embed Video component are marked 'Required,' watching the video will save the learner's progress in the video timeline as they watch it. If a learner happens to refresh their webpage or leave the module while the video plays, they will not lose their place unless there was a temporary disruption in their internet connection. A learner can rewind the video from their place in the video timeline, but they cannot progress past the point they have viewed up to. Once the video has fully completed, their module page will be allowed to be 'Marked as Complete.'
When all settings of the Embed Video component are NOT marked 'Required,' watching the video will still save the learner's progress in the video timeline as they watch it. If a learner happens to refresh their webpage or leave the module while the video plays, they will not lose their place unless there was a temporary disruption in their internet connection. A learner can rewind or fast forward the video to any point in the video timeline. The video will not be required to watch completely in order to mark the module page a 'Mark as Complete.'
Preview:
Settings:
At the top of these settings, add a prompt to guide the participant or provide a title to the video. You can then click 'Select Video' to embed a video that you have uploaded as an artifact.
- If you would like for the embedded video to be required viewing in order to progress past this page, toggle the 'Required to Complete?' button ON.
- If you would like to restrict a learner's ability to fast forward through the video, toggle the 'Disable Fast Forwarding' button ON.
SCORM Package
The SCORM Package component allows authors the ability to import specific SCORM package ZIP files of their learning courses directing into TORSH Talent Learning Path Modules. These SCORM Package components then allow learners to directly engage in the learning materials of that imported course all in one place!
Preview:
Settings:
At the top of these settings, add a prompt to guide the participant, and provide a further description if needed. To add your SCORM Package ZIP file, click the 'Select SCORM Package (.zip)' button and add the SCORM Package of your course to this component.
You can only add (1) ZIP to a SCORM Package component. If you would like to house more SCORM Packages, consider adding the next SCORM Package in either a separate Learning Path module, or adding it into a separate SCORM Package component within the module page, or adding it into a separate page of the same Learning Path module, depending on how you wish for the material to be accessed and organized.
Within the component, the SCORM Package will be presented to the learner as the fully accessible course:
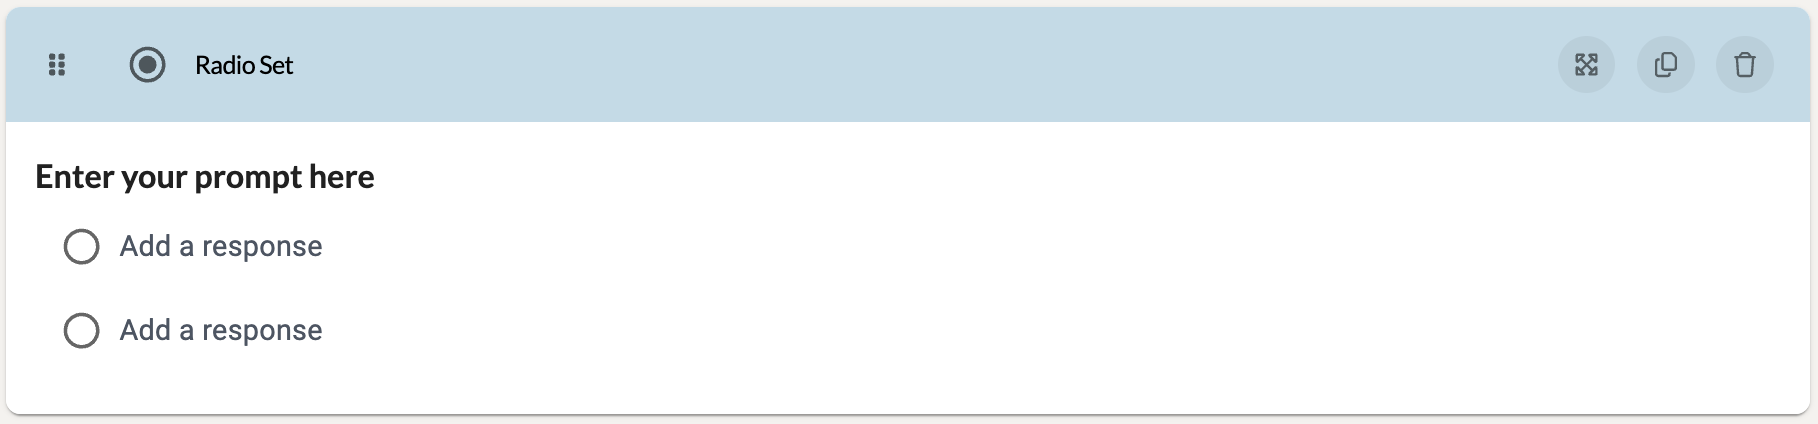
Radio Set
The Radio Set component allows users to choose one item from a set of radio button inputs. These can be useful when creating a multiple choice questionnaire.
Preview:
Settings:
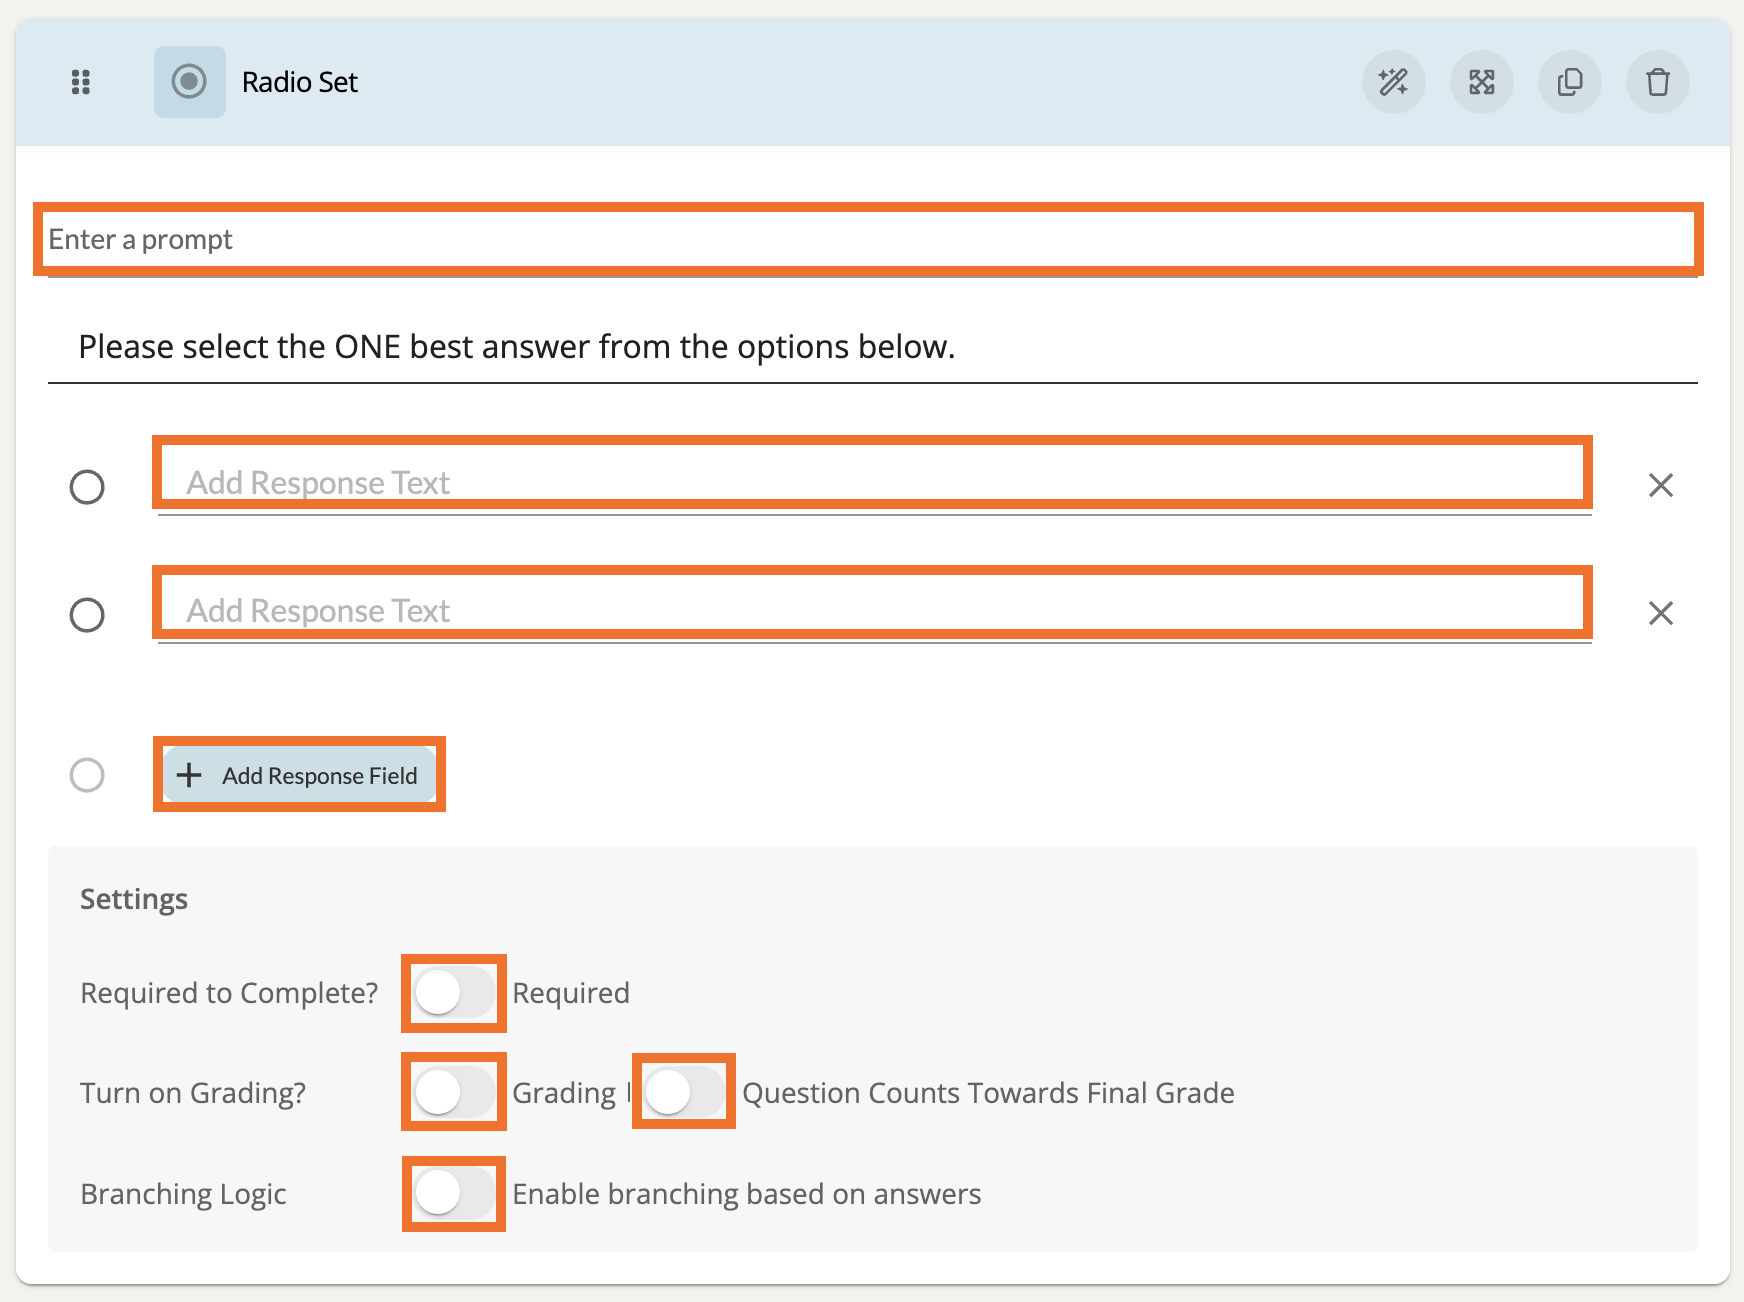
At the top of these settings, add a prompt to guide the participant. Make sure to add response text for each Response Field. If you would like for a response field to have a score/value, you can enter that beside the response text. You must have at least (2) Response Fields for this component.
To add another Response Field, click the '+ Add Response Field' button.

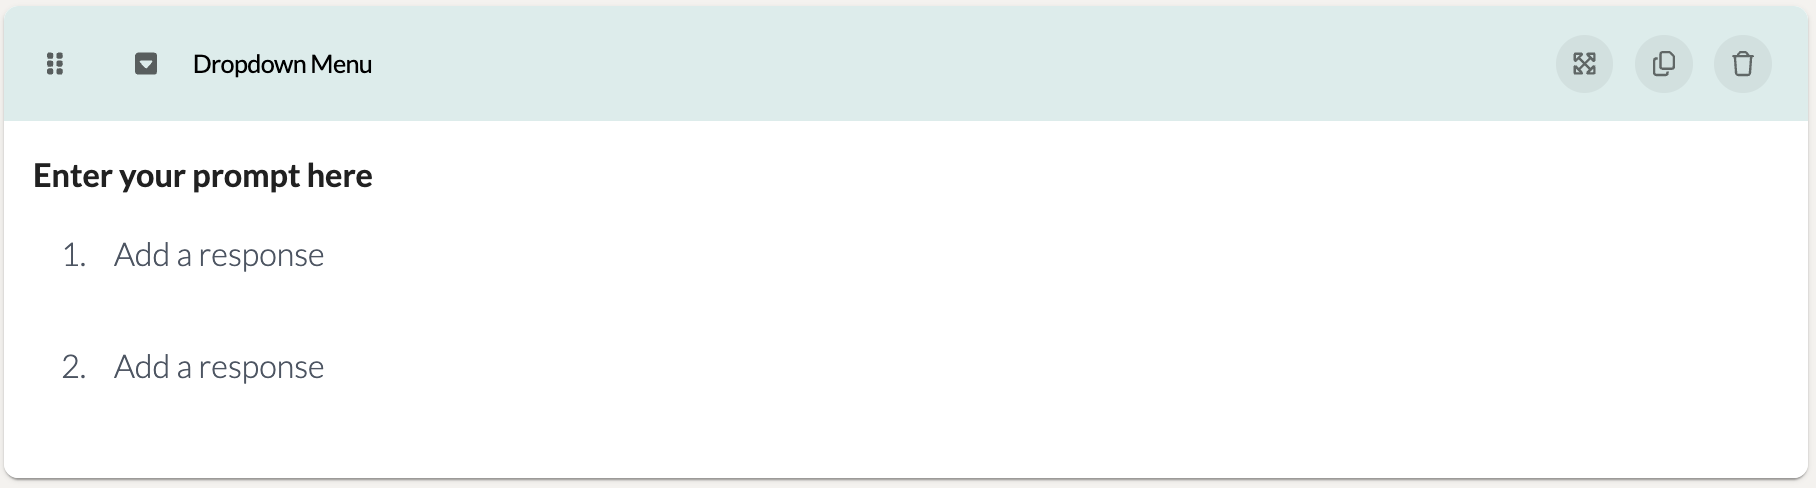
Dropdown Menu
The Dropdown Menu component allows participants to choose one item from a dropdown list. This can be useful if, say, participants need to select the location that their practice took place in.
Preview:
Settings:
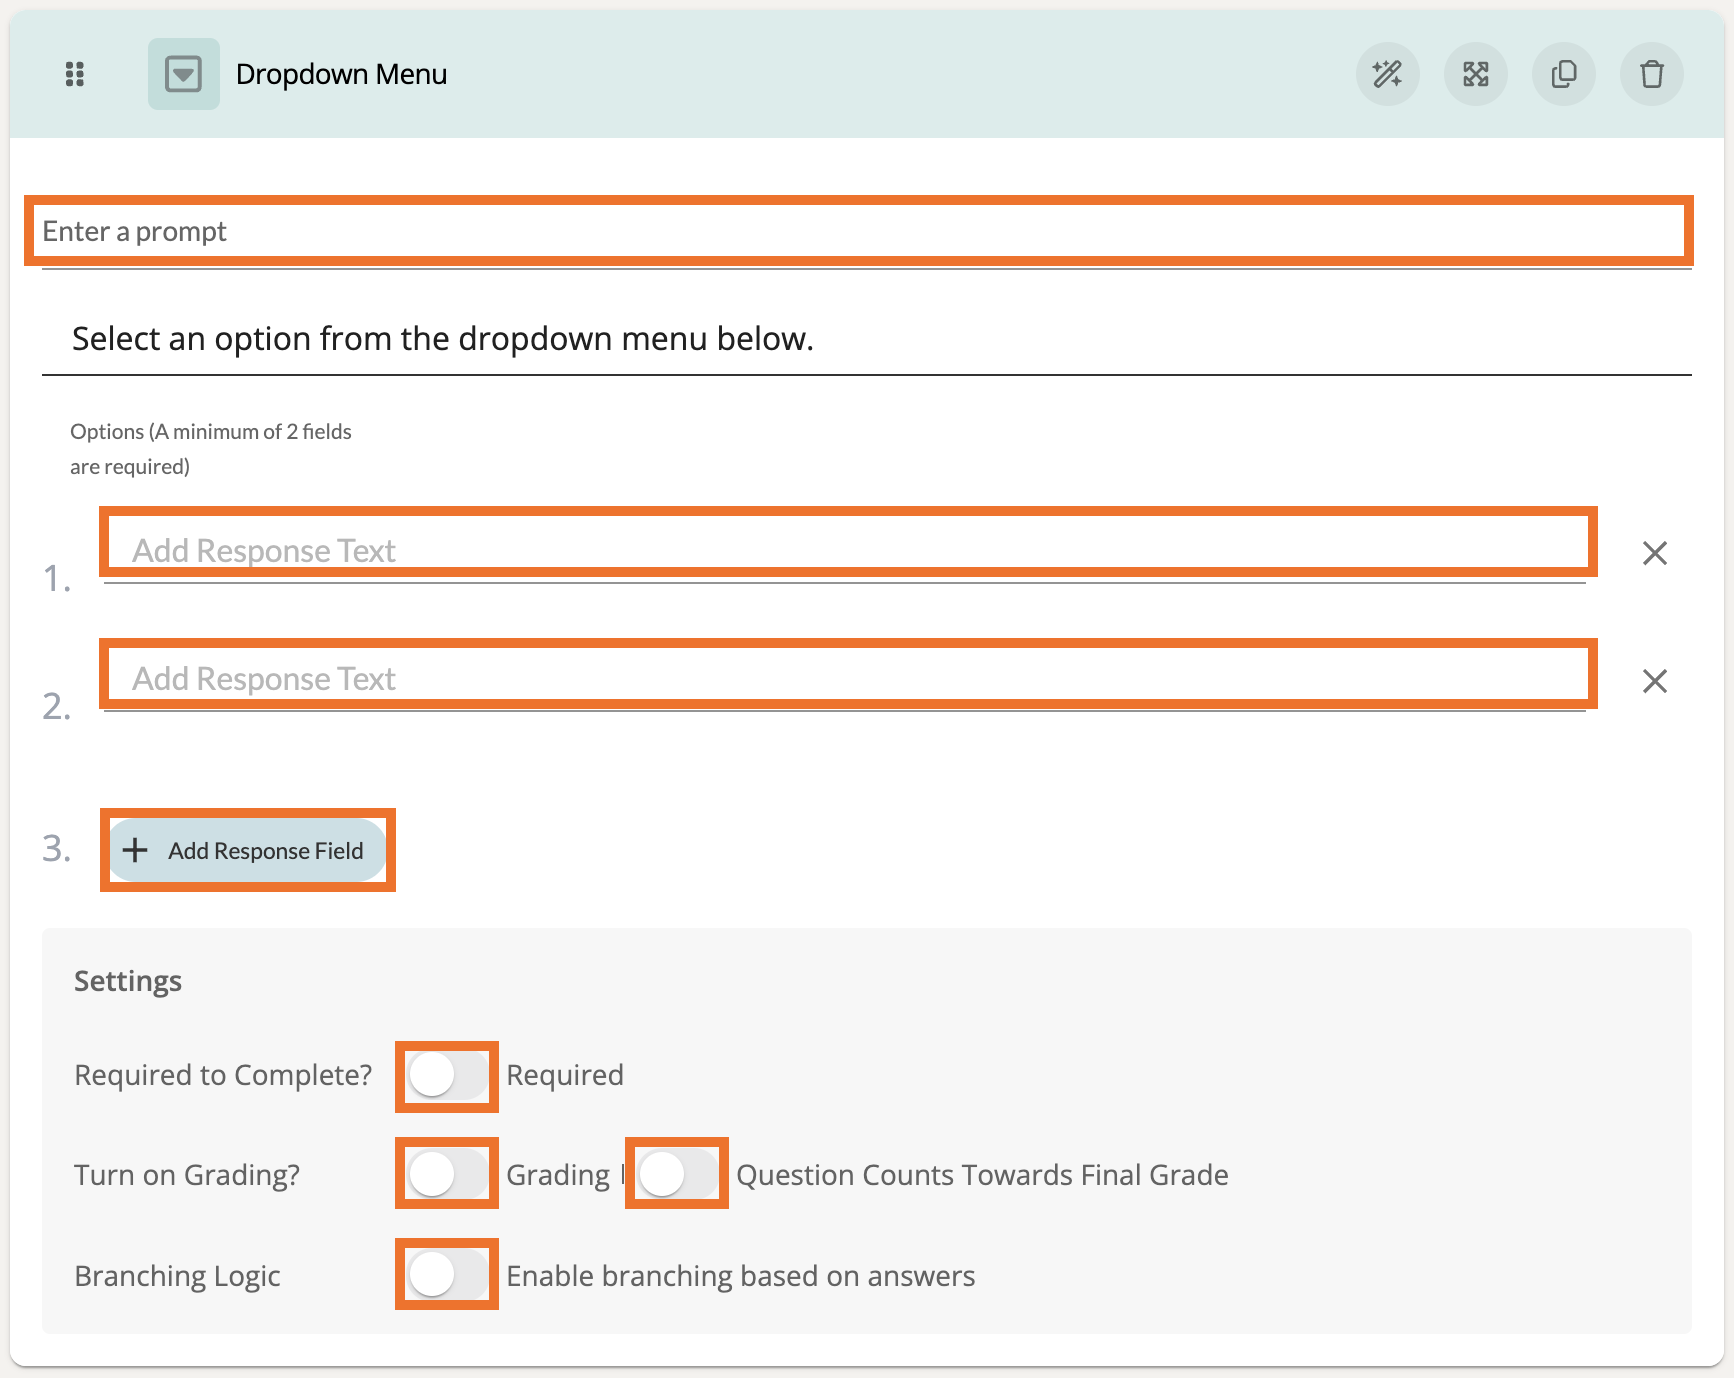
At the top of these settings, add a prompt to guide the participant. Make sure to add response text for each Response Field. If you would like for a response field to have a score/value, you can enter that beside the response text. You must have at least (2) Response Fields for this component.
To add another Response Field, click the '+ Add Response Field' button.

Checkbox Set
The Checkbox Set component allows participants to choose multiple items from a set of checkboxes. This can be useful for participants to check off all items that apply to their practice.
Preview:

Settings:
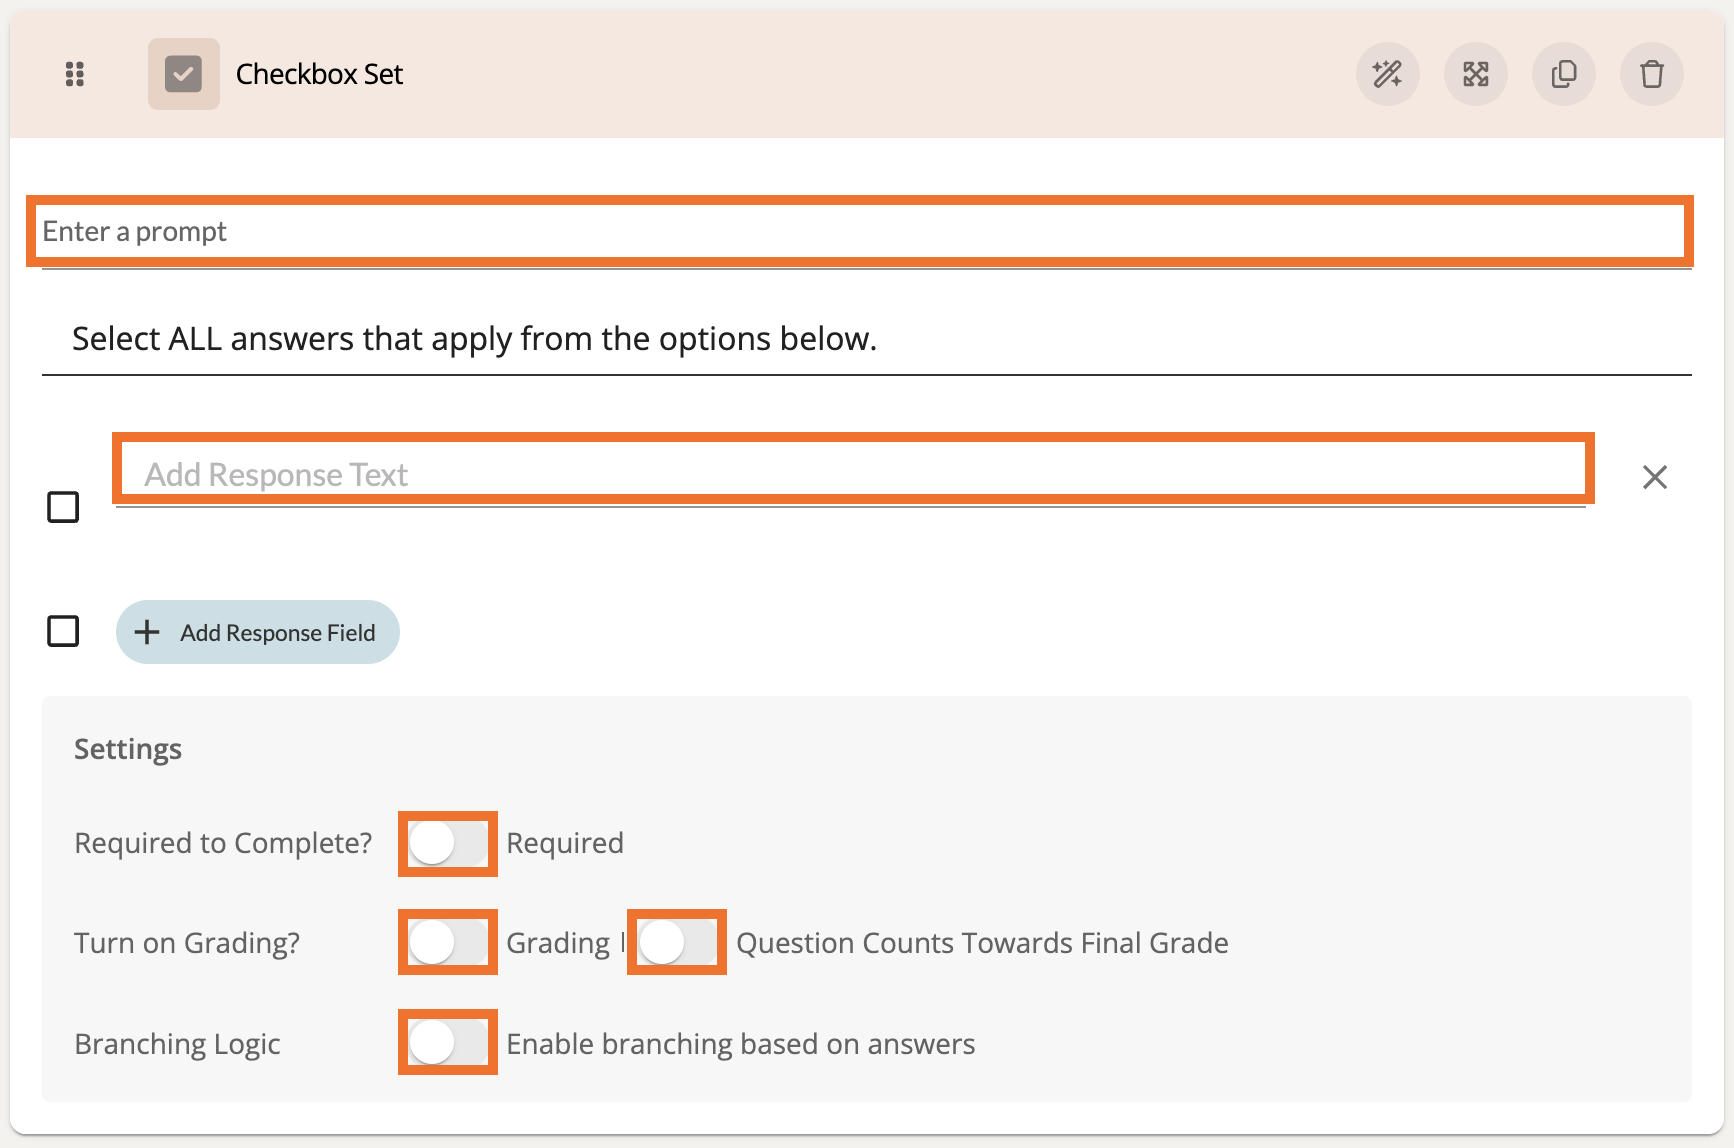
At the top of these settings, add a prompt to guide the participant. Make sure to add response text for the Response Field. If you would like for a response field to have a score/value, you can enter that beside the response text.
To add another Response Field, click the '+ Add Response Field' button.

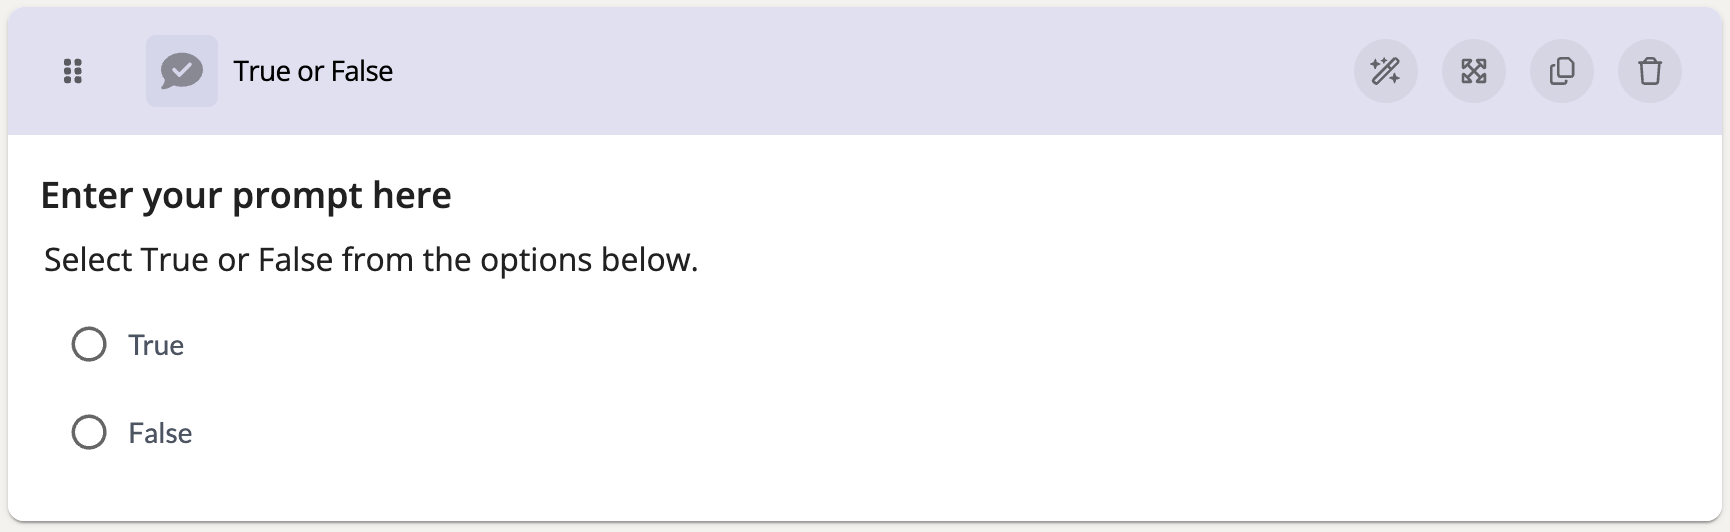
True or False
The True or False component allows participants to select if a statement is true or false. This can be useful to quiz participants based on their memory of previously taught material.
Preview:
Settings:
User Response
The User Response component offers a variety of options for a participant to respond with. Depending on the settings you enable, a participant can choose to either upload a video or file, insert a URL, and/or provide a typed response. This can be great when asking participants to provide a short answer to a question or when requesting for specific material be uploaded.
Preview:

Settings:
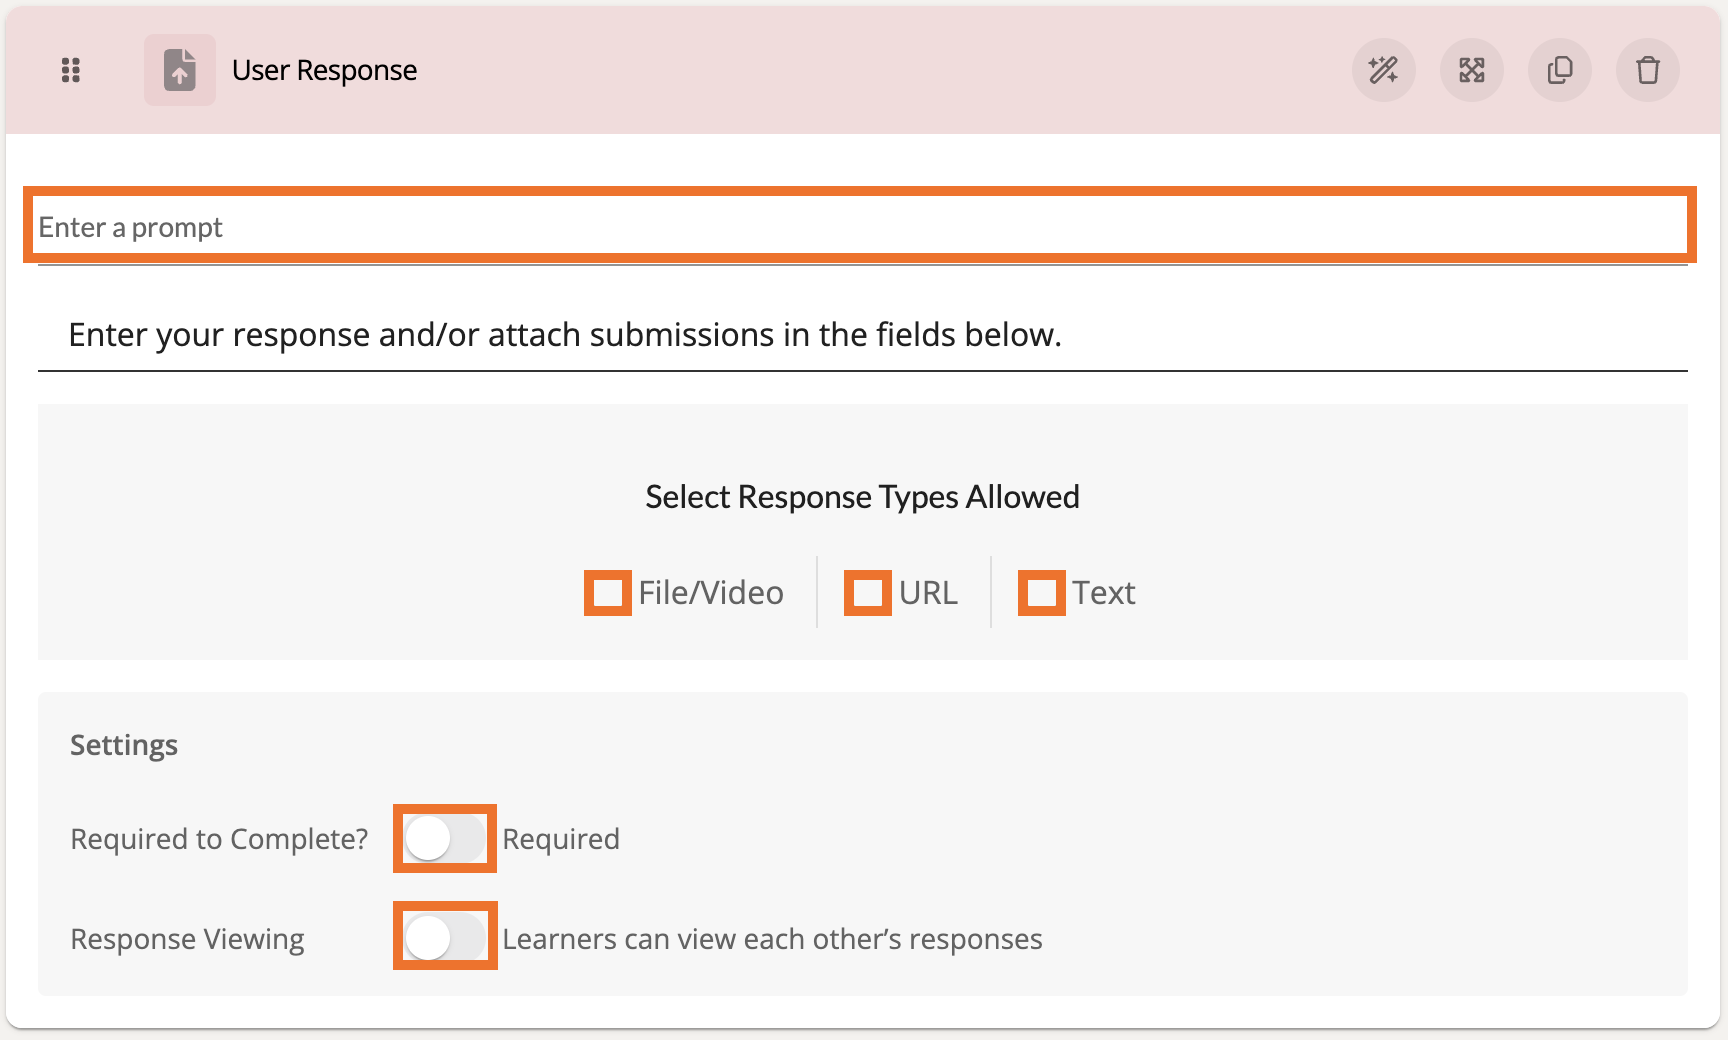
At the top, add a prompt to guide the participant. Then check off from the Select Response Types Allowed section to designate how a user can respond to this component.
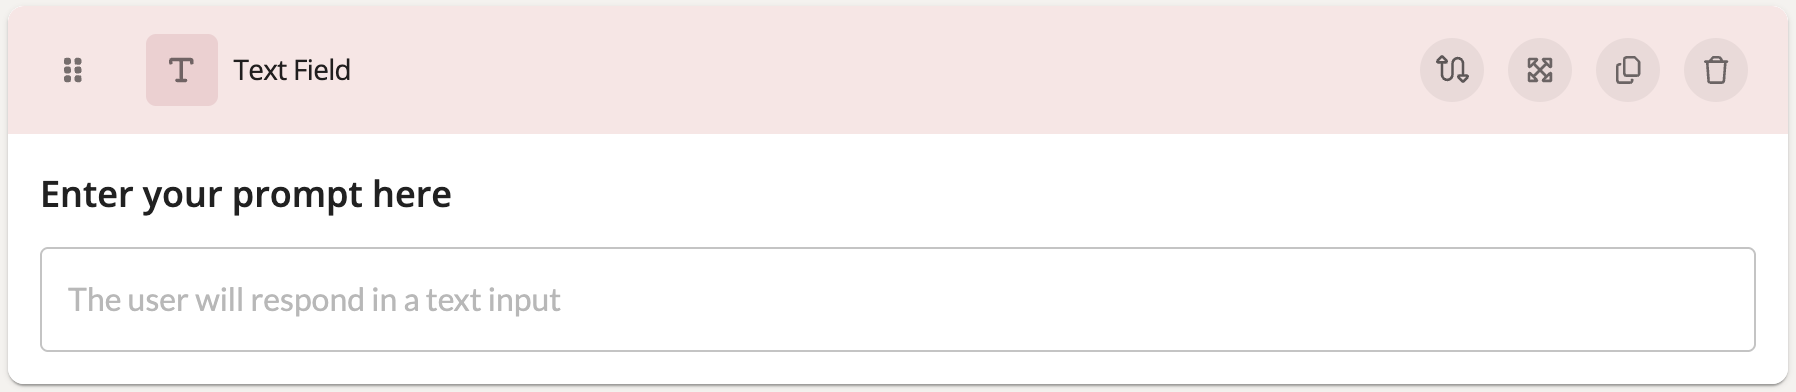
Text Field
A Text Field component offers a small space to type a small amount of text for an answer prompt. This component can be useful when asking participants to respond in short responses.
Preview:
Settings:
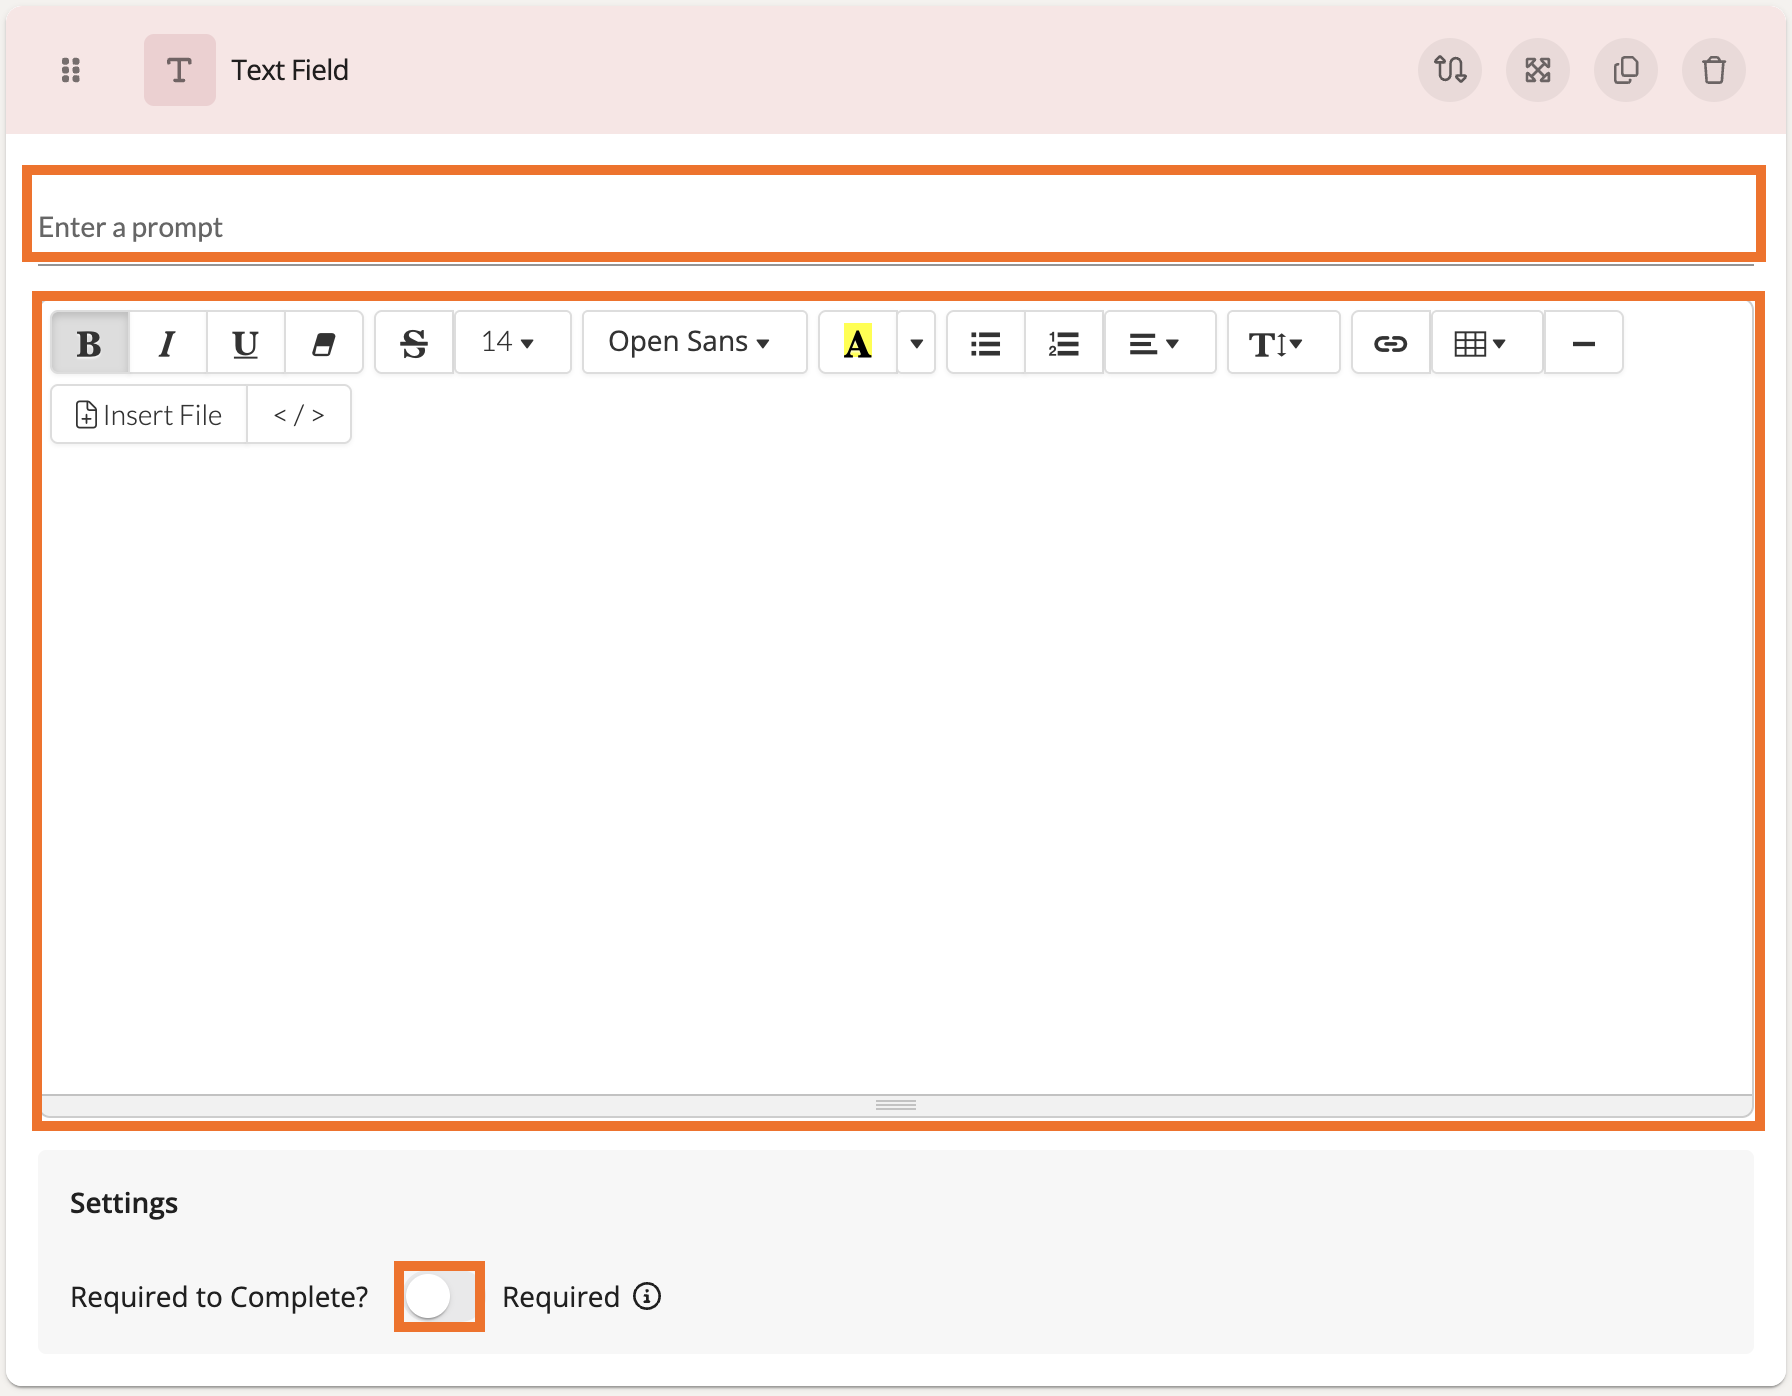
At the top, add a prompt to guide the participant. Below the prompt, add further text if a more detailed question or description is necessary. You can also mark if the prompt is required or not.
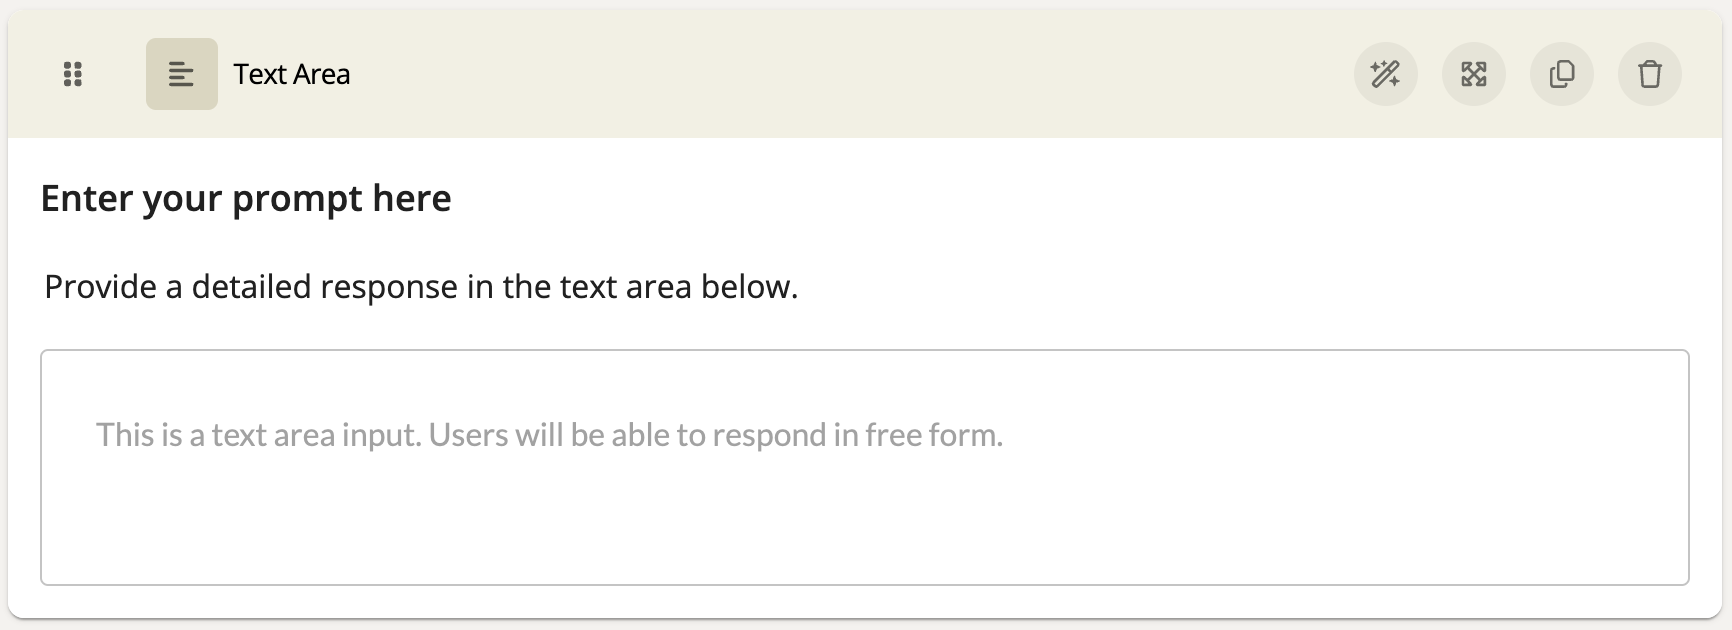
Text Area
A Text Area component offers a larger space to type a large amount of text for a response. This component can be useful when asking participants to respond in full sentences and paragraphs.
Preview:
Settings:
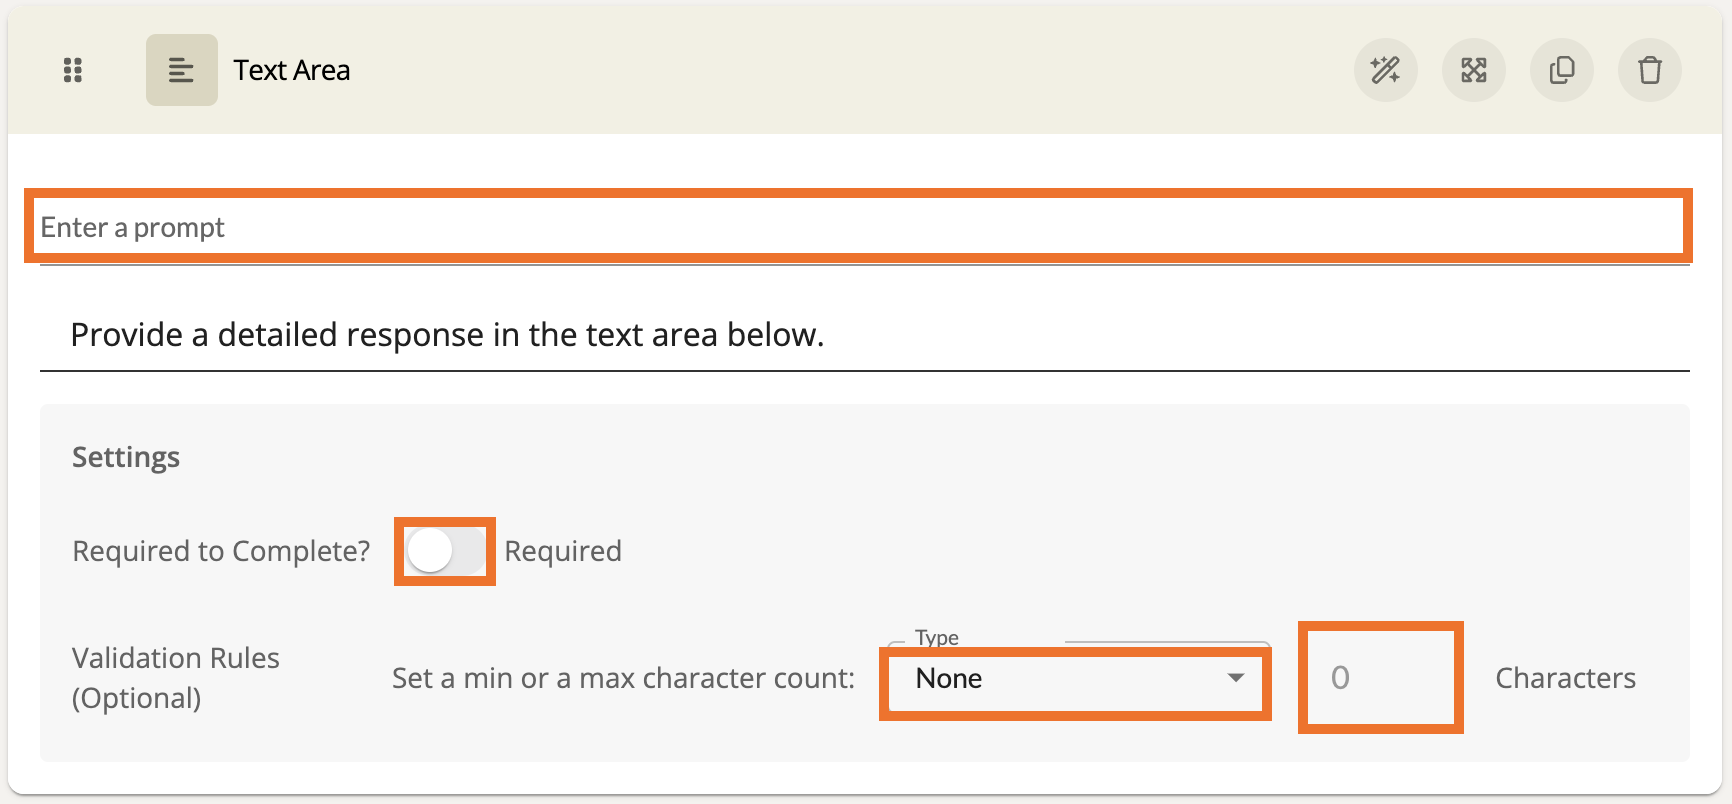
At the top, add a prompt to guide the participant. Below the prompt, you can also enforce a minimum character count permitted for the response as well as a character limit.
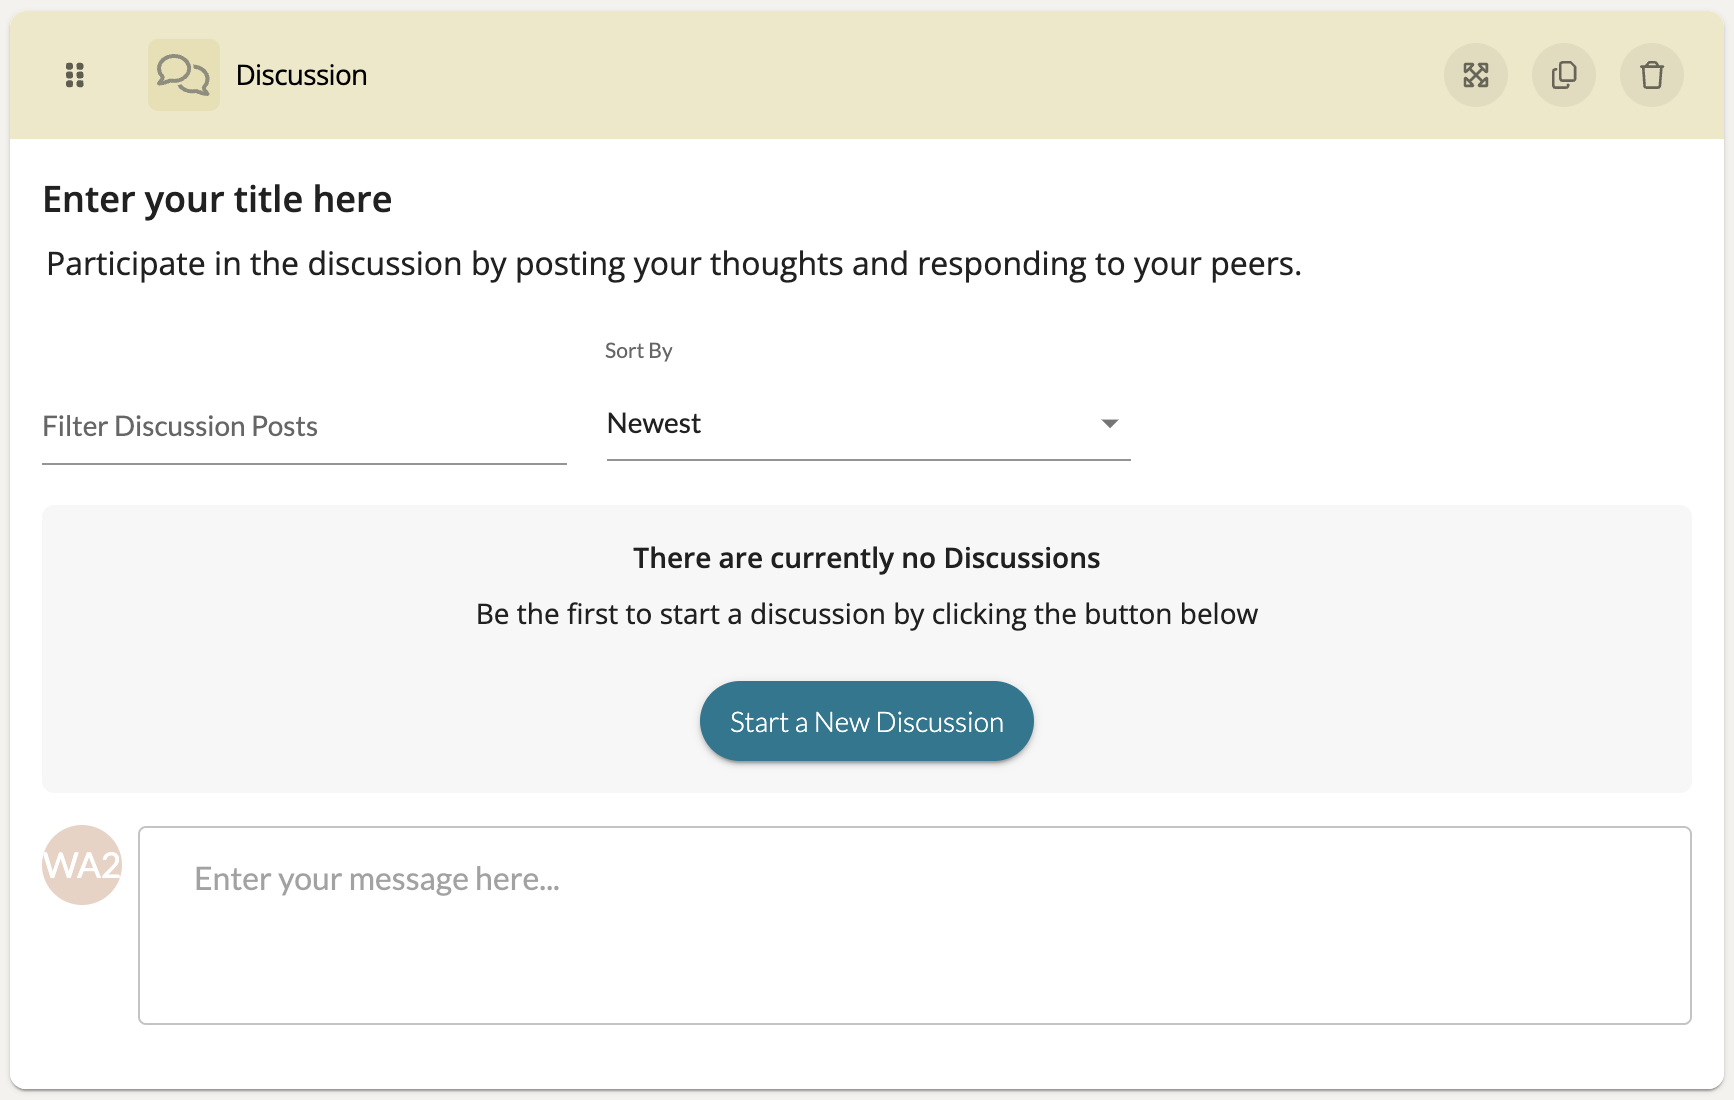
Discussion
A Discussion component allows participants to write and respond to one another. This is only available to modules with Discussion capability enabled. This can be useful for collaboration between members completing a shared training experience.
Preview:
Settings:
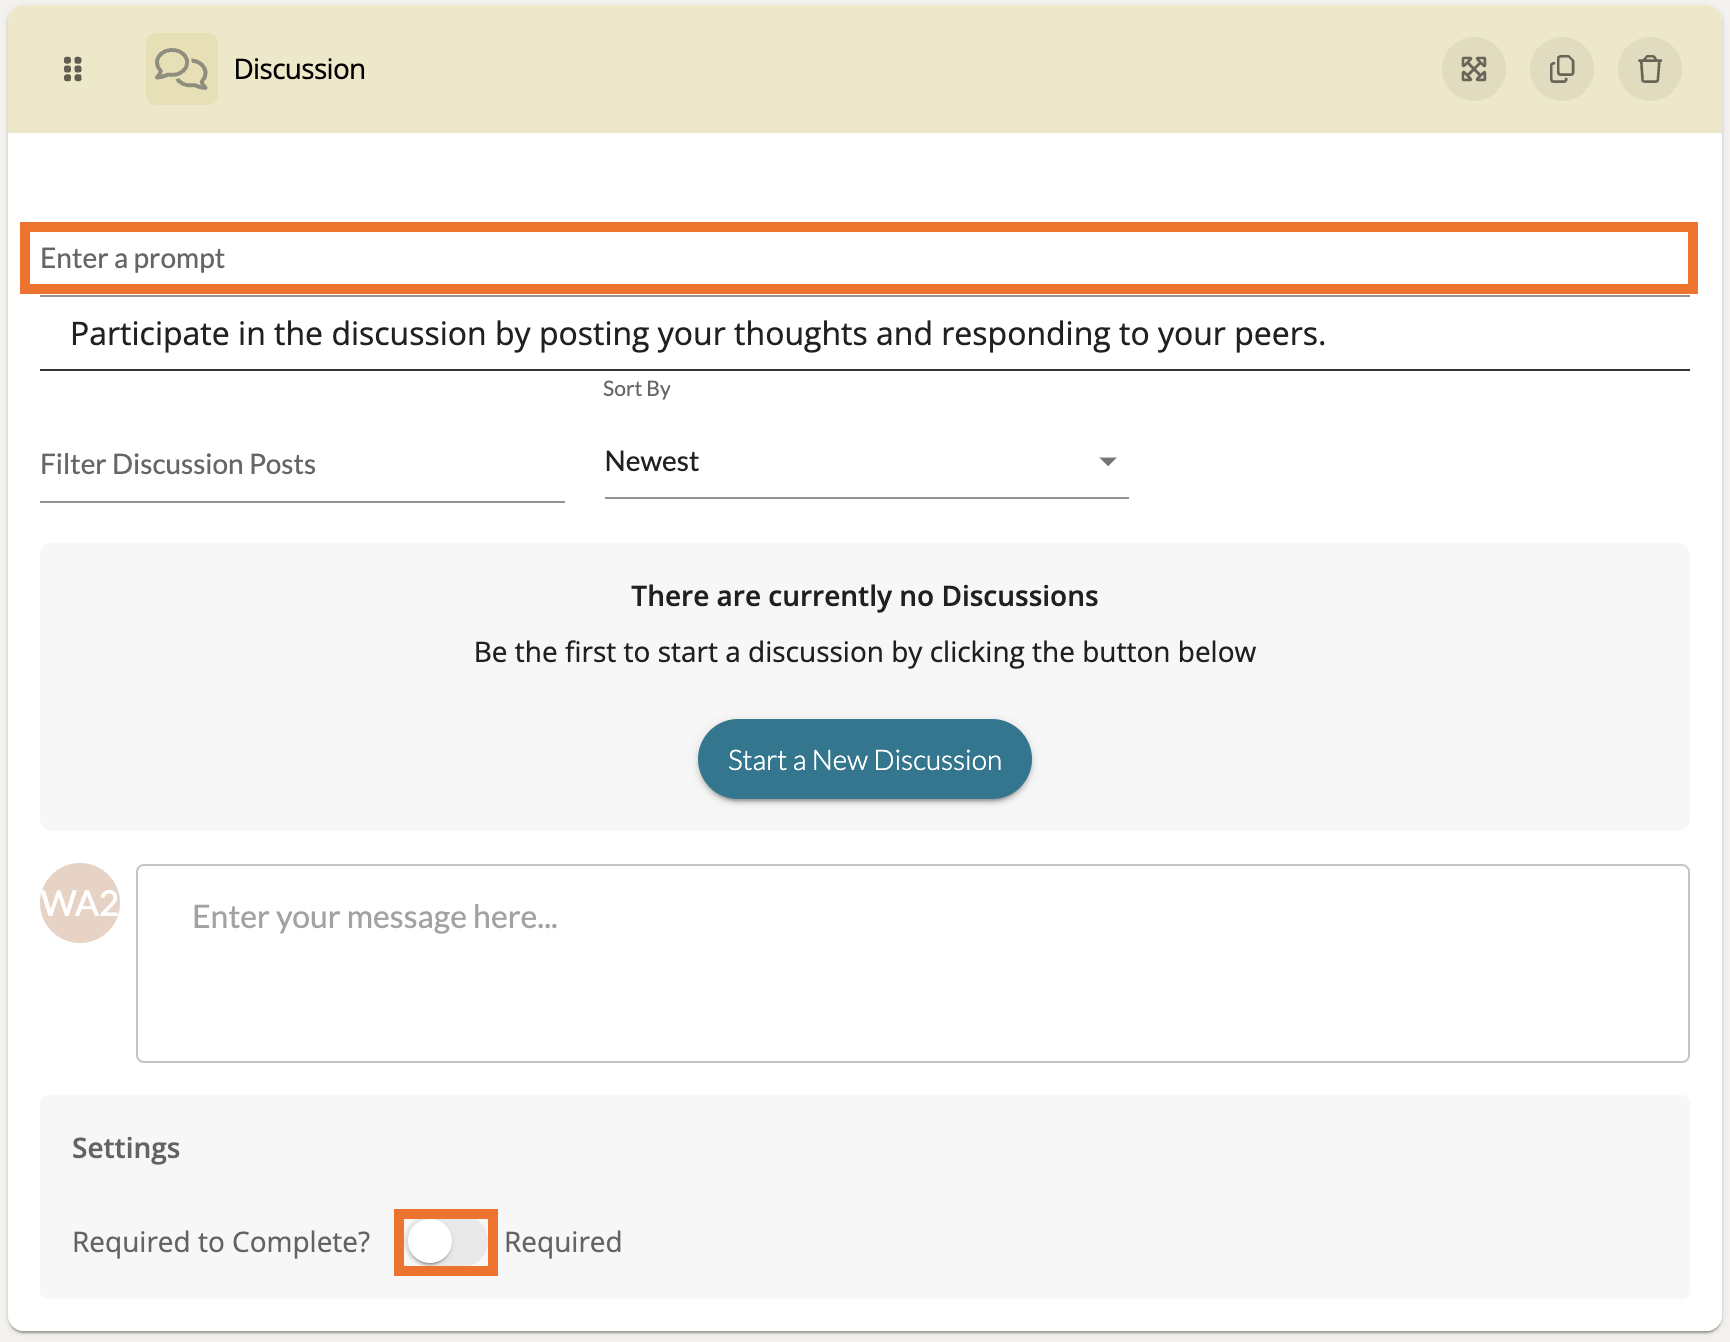
At the top, add a prompt to guide the participant.
Complete a Data Form
You can assign an Complete a Data Form component to help direct learners in completing various observations, self assessments. Through this component, learners can evaluate assigned artifacts and complete forms directly through the Learning Path module!
Once the component has been added to the section, click on the Complete a Data Form component to open its Edit view. Give your Activity a prompt title and a further description with instructions of what to complete.
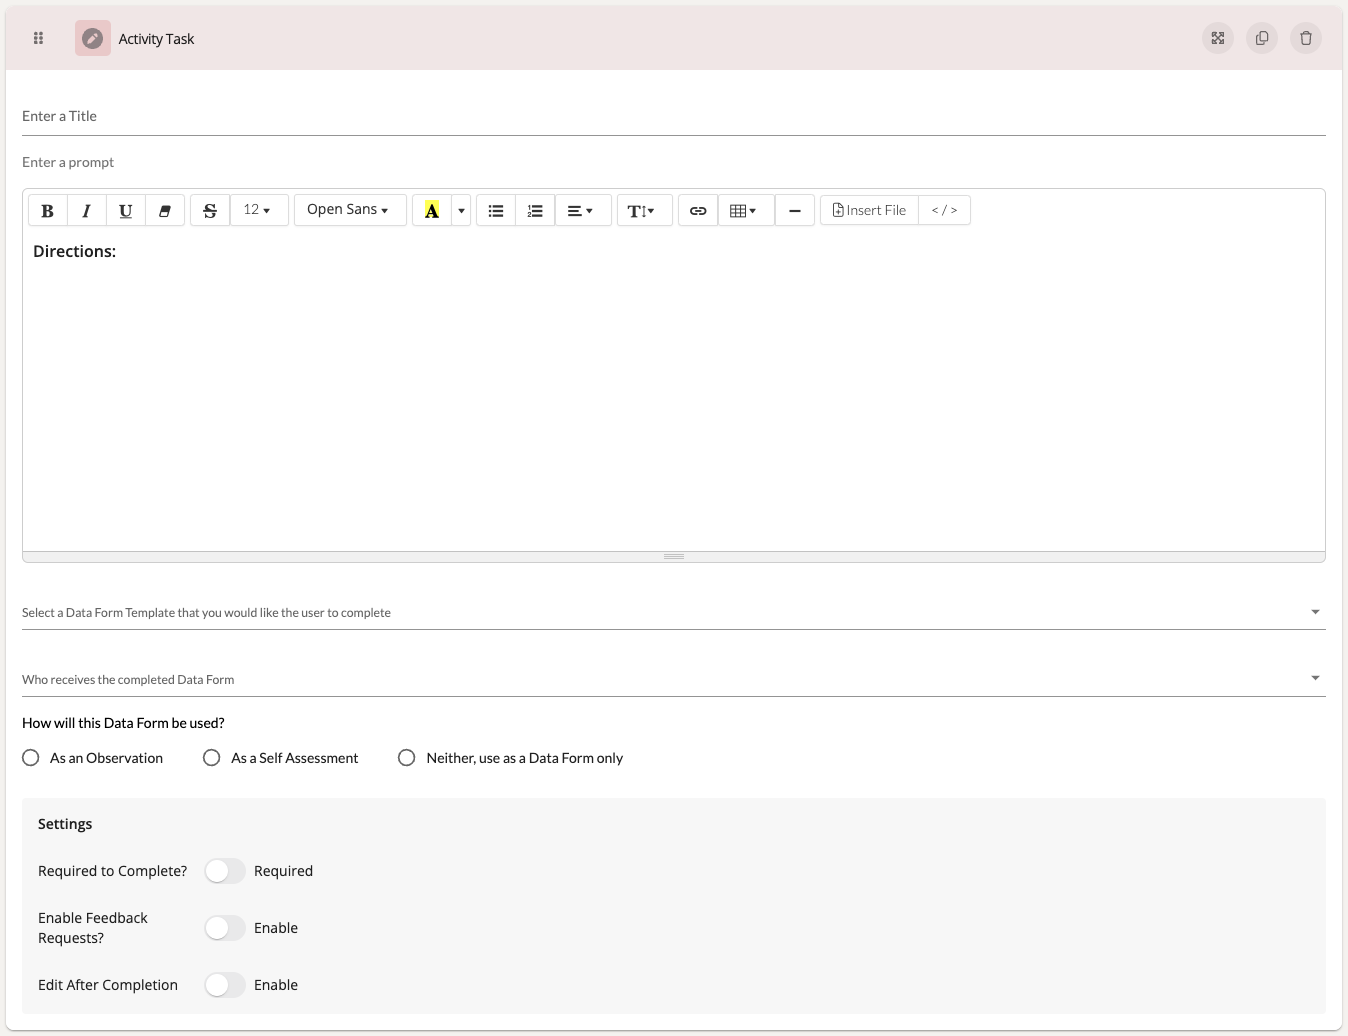
Next, choose the Data Form Template you would like for the user to complete. Then choose the user or group you would like to assign the completion of this form to.
Under 'How will this Data Form be used?' choose the the type of form you would like to have this template completed as:
- Observation
- Self Assessment
- Data Form
If you choose an Observation or Self Assessment, you will then be need to choose whether the form process is Informal/Formal and whether it is for an in-person session or for an uploaded artifact.
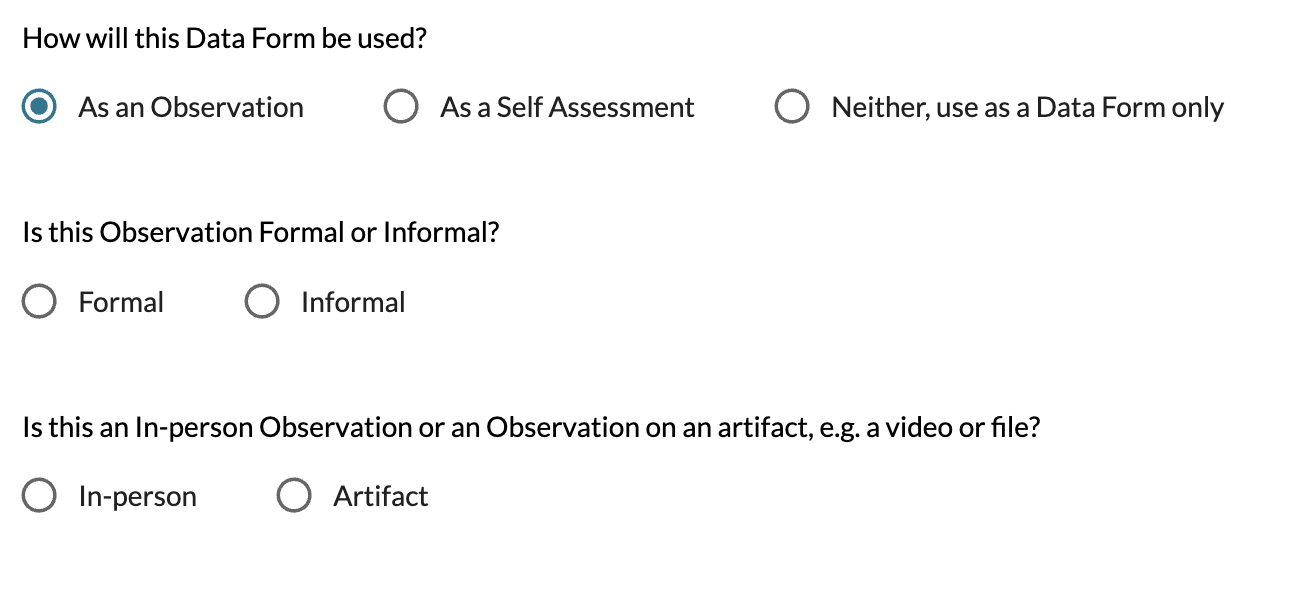
If the Observation or Self Assessment to complete is for an artifact, you will then be prompted to choose the artifact in question.
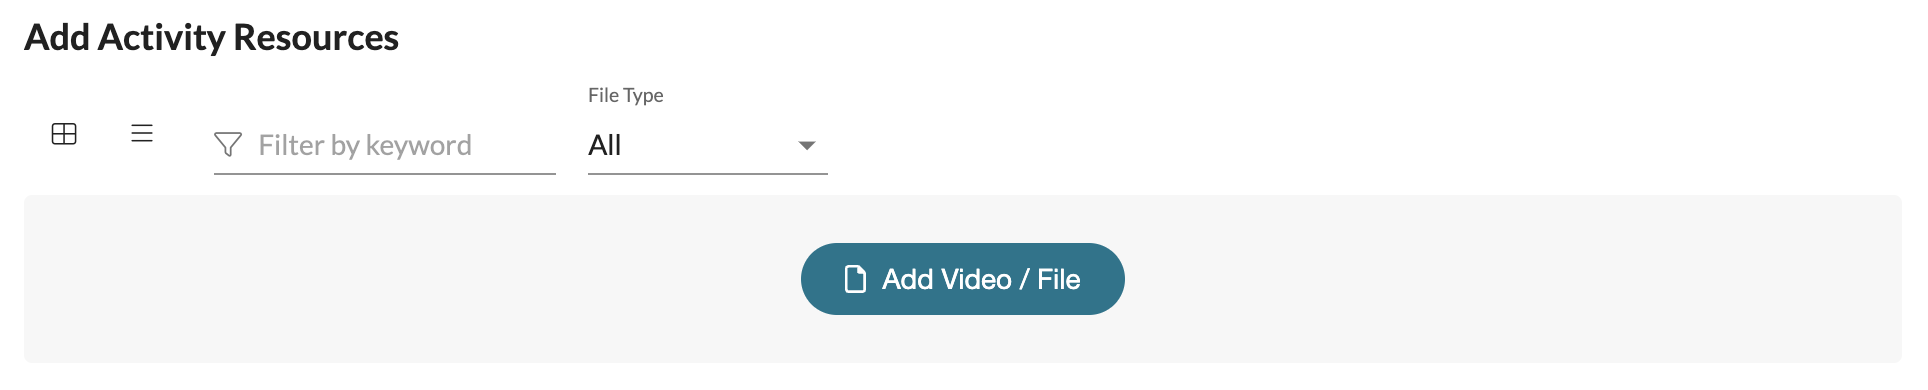
Afterwards, feel free to add an Resources (videos and/or files) that you think would be helpful for the completion of this task.
Lastly, you can mark this component as 'Required' if necessary. You can also enable Feedback Requests in case you would like for the participant of the form to be able to request further feedback on what they observe. Lastly, you can enable 'Edit After Completion' for the participant of the form to make further adjustments after marking the form as complete.
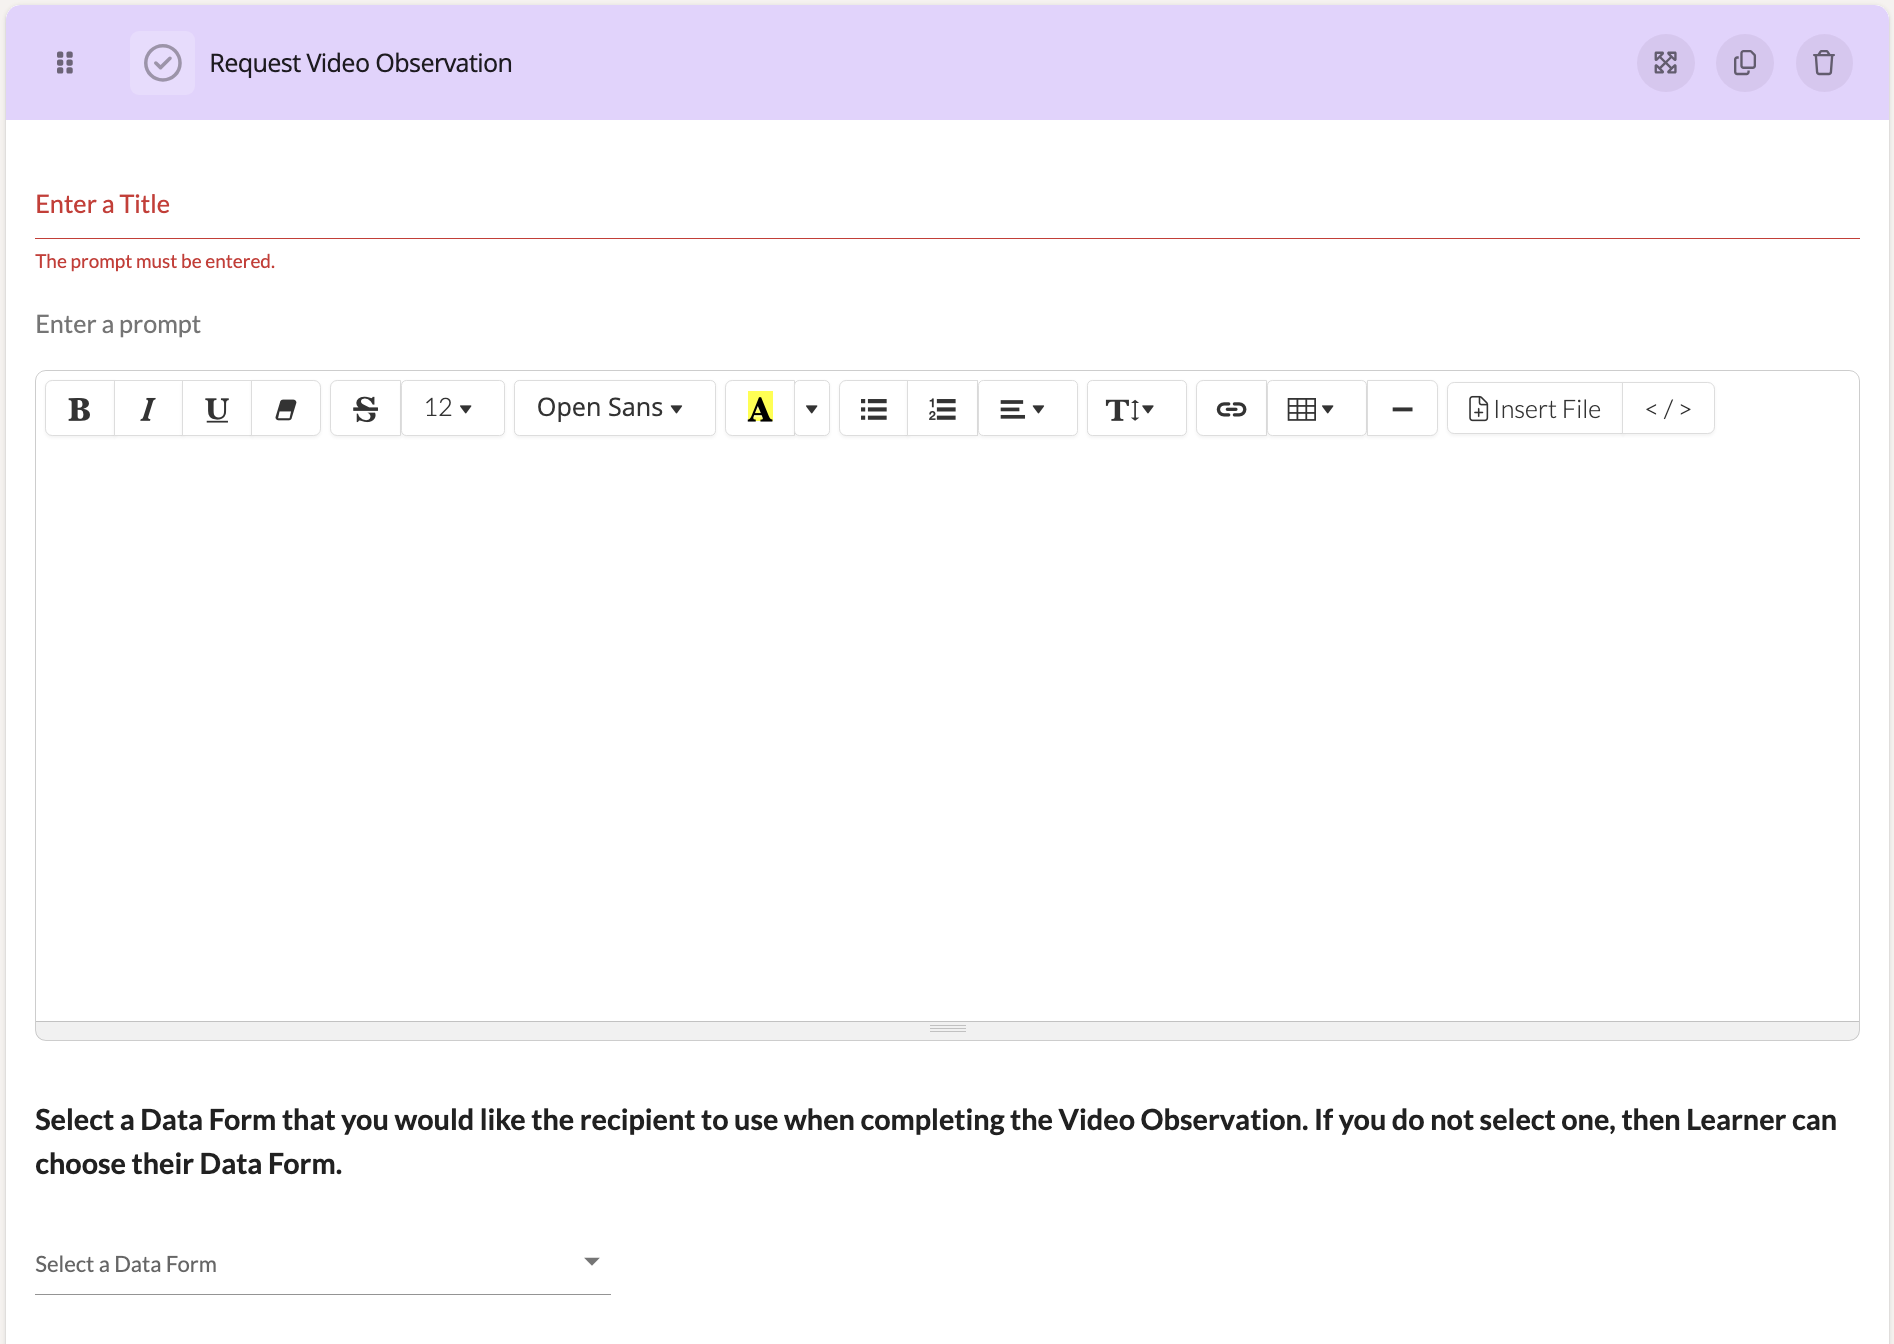
Request Video Observation
You can assign an Request Video Observation component to help direct learners to upload materials and assign the materials to be observed by others. Through this component, learners can quickly be prompted to assign a video of their choosing for other individuals to then observe!
Once the component has been added to the section, click on the 'Request Video Observation' component to open its Edit view. Give your component a prompt title and a further description with instructions for your learner(s) to follow for how to send out the observation request.
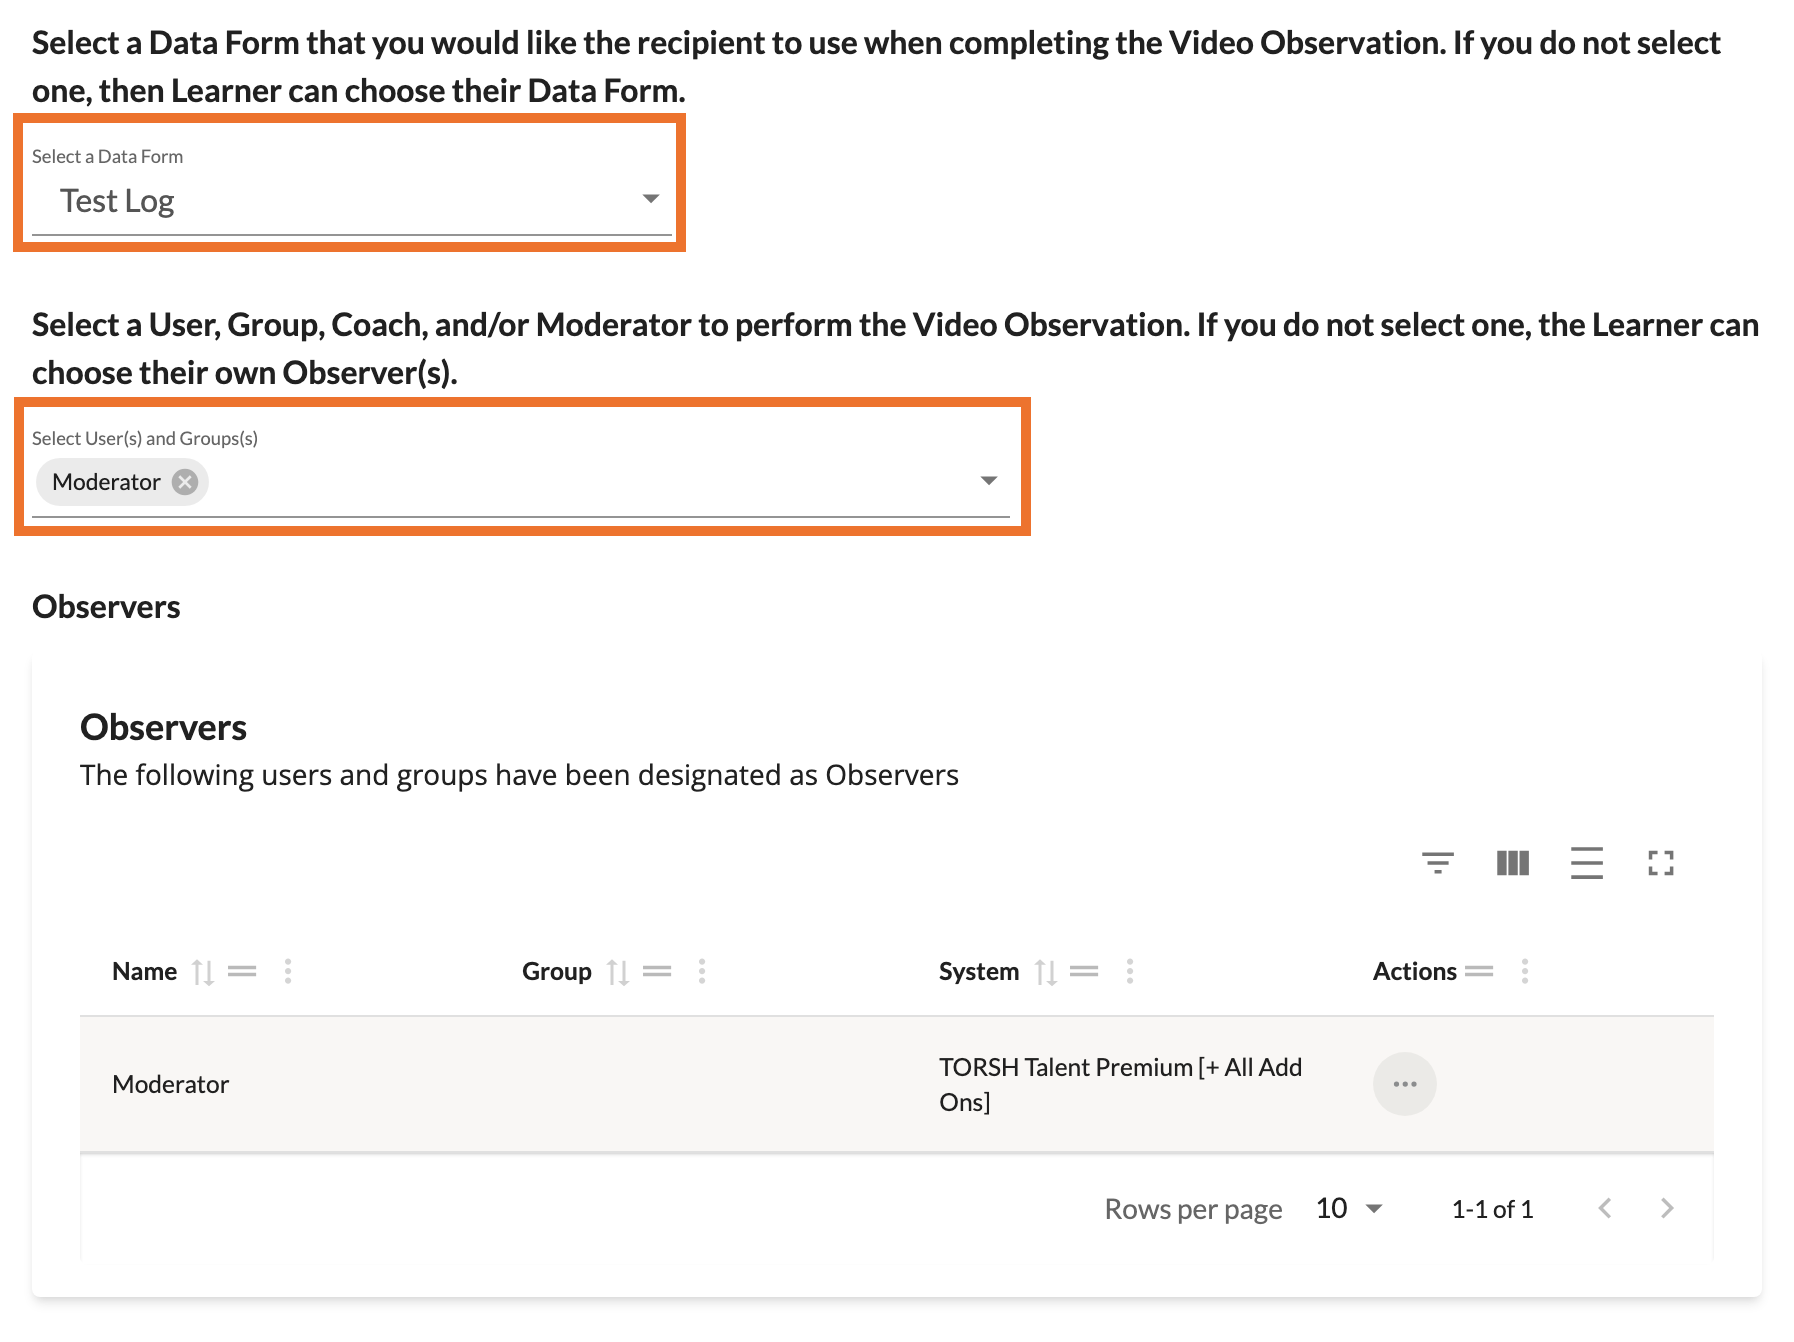
Choose the Data Form Template you would like for the other user to complete for your learner when viewing the uploaded material. You can also leave it blank for the learner to then choose their own template.
Choose the user or group you would like to assign the completion of this form to. NOTE: By default, it will be set to the 'Moderator' of the module, but you can easily change this as needed. You can also leave it blank for the learner to then choose their own observer.
Scrolling down further, you can then choose to provide an email message in the text box with instructions for the other users/groups who will be requested to complete the observation. This message will be forwarded to the assigned user(s) when the learner completing this component initiates the observation request.
However, you can also leave this blank and allow the learner to type up the email message themselves.
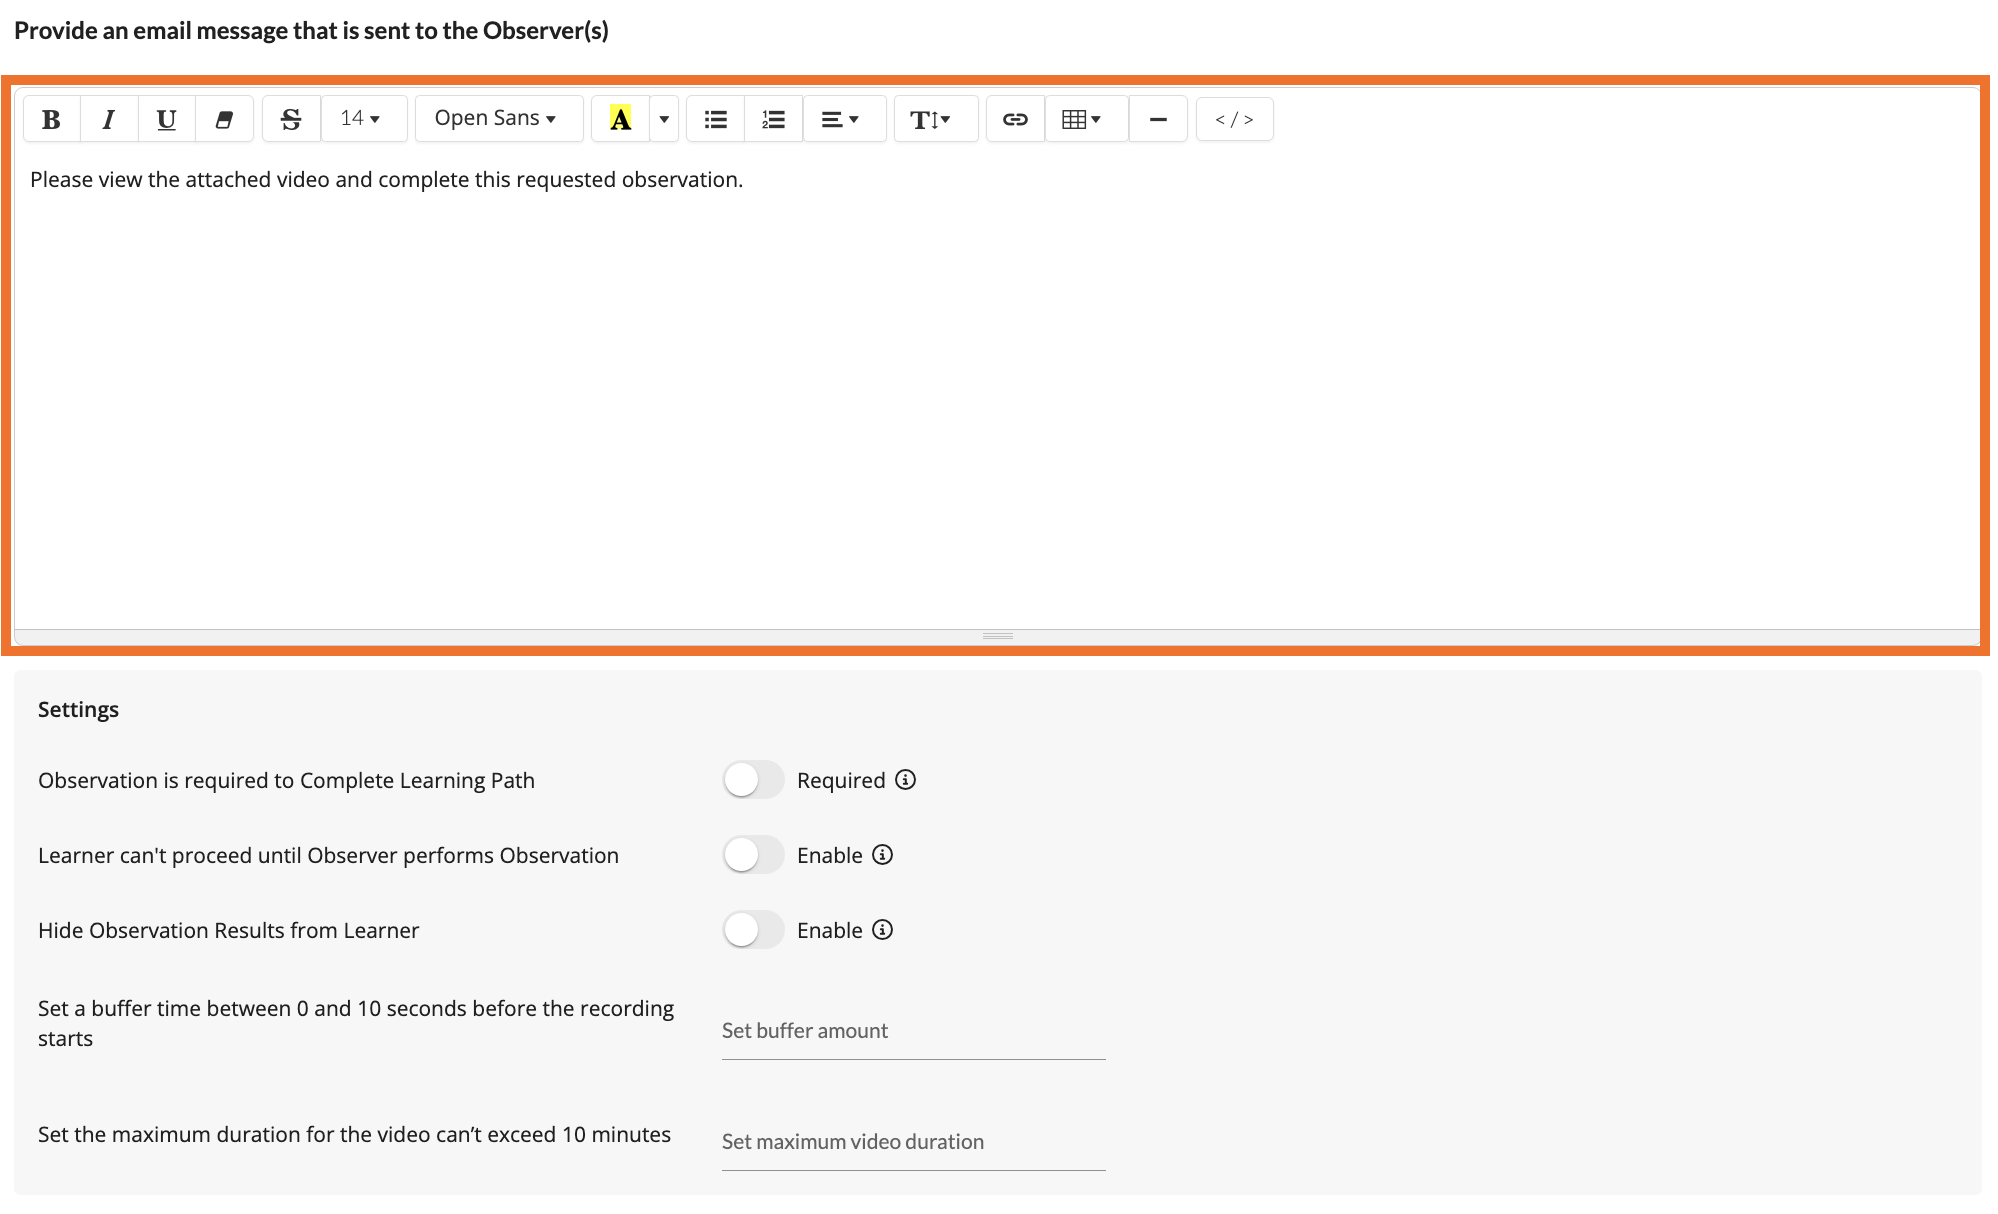
At the bottom of the component, you can:
- Mark this component as 'Required.'
- Enable whether or not the learner sending the Observation Request can proceed in the module until the requested observer completes the observation form.
- You can even hide observation scores from the learner, if necessary.
If the learner is meant to immediately record a video session via this component, you can set a buffer time between 0 and 10 seconds before their recording session starts in the built-in recording tool of the website. You can even set a maximum duration time for the recording/video chosen to be observed.
Resources
A Resources component allows participants to review various artifacts provided by the author. This can be helpful for referencing or learning specific material that they will be quizzed on later.
Preview:

Settings:
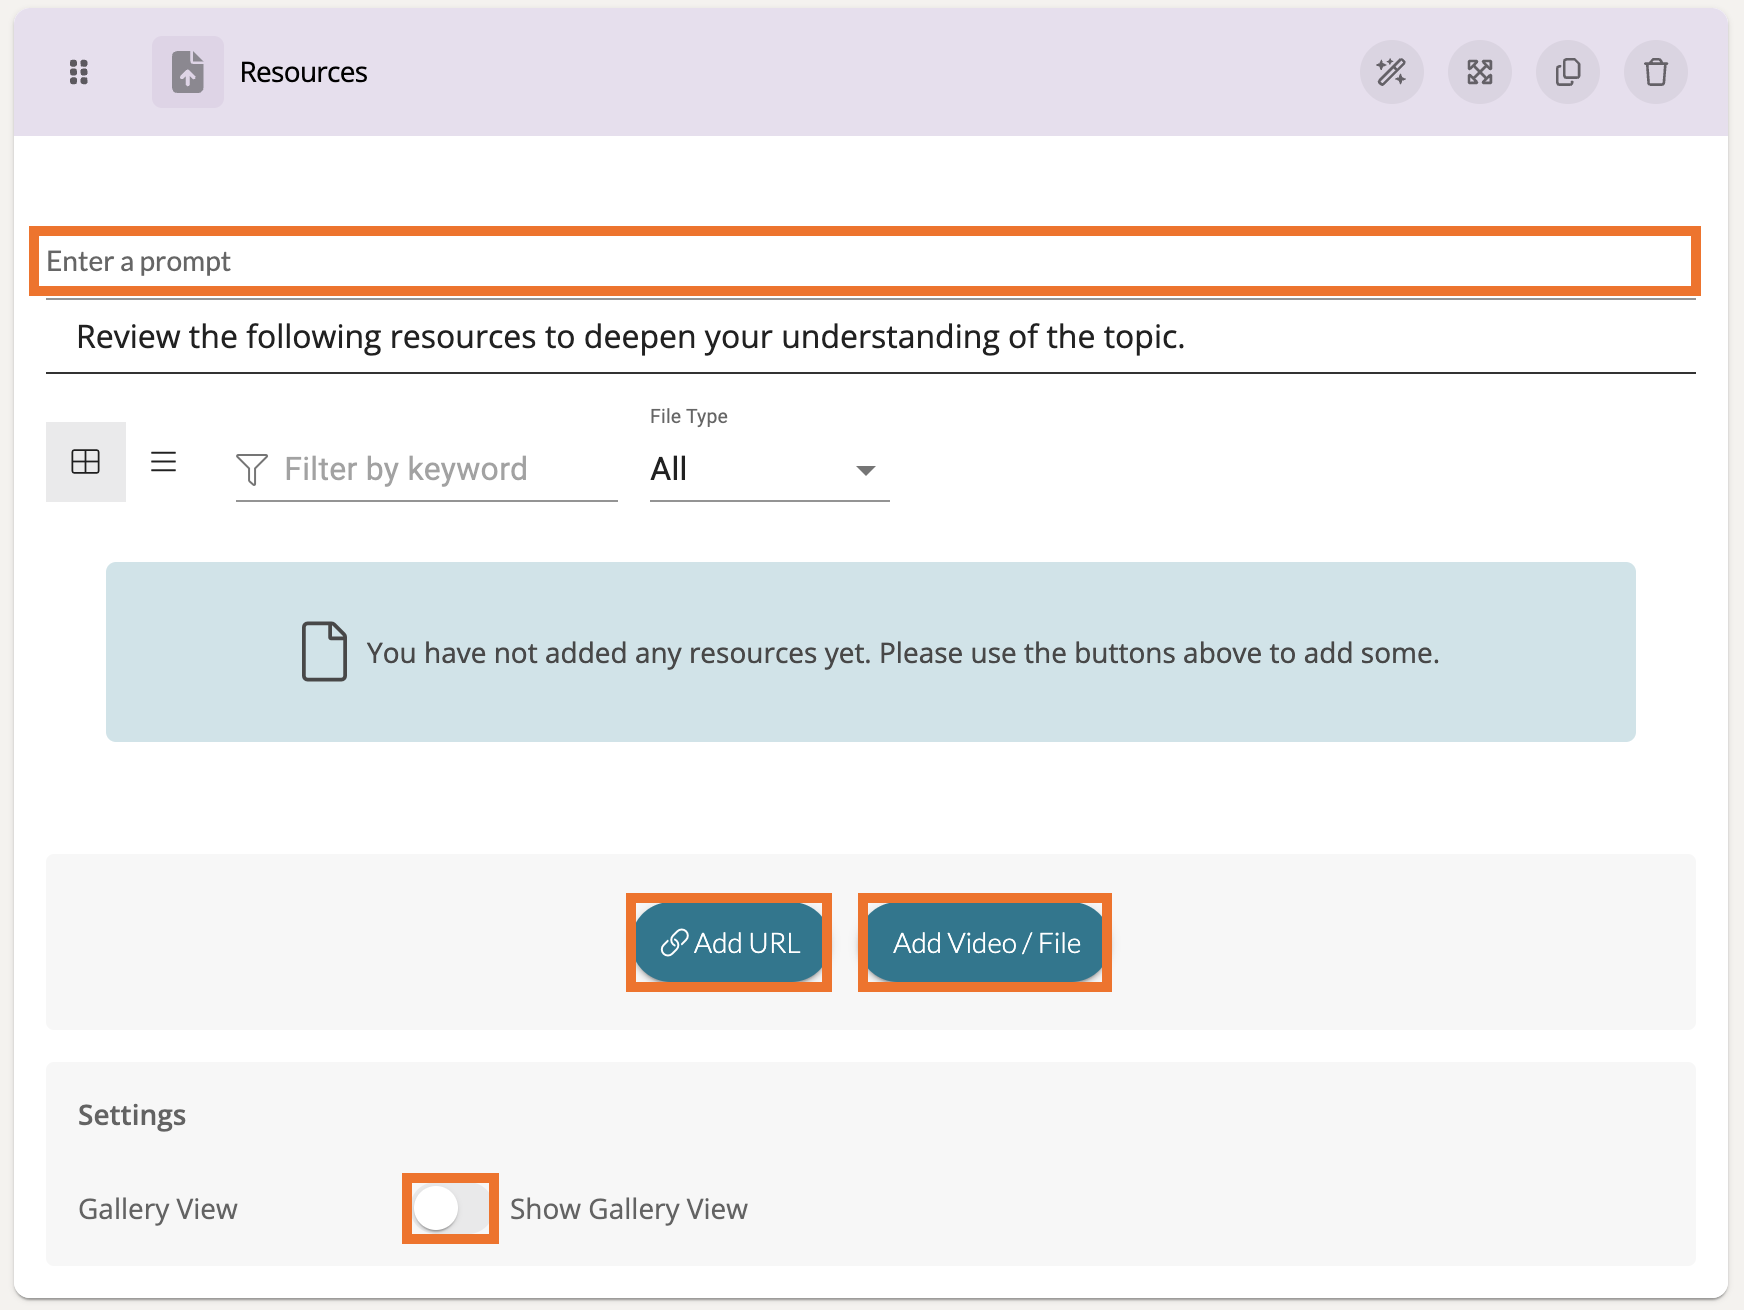
At the top, add a prompt to guide the participant.
Text Editor
The Text Editor component is strictly for providing explanation and instruction from whomever is creating the data form template. This component does not gather any data, but it can be useful for providing further information in your forms.
Preview:

Settings:
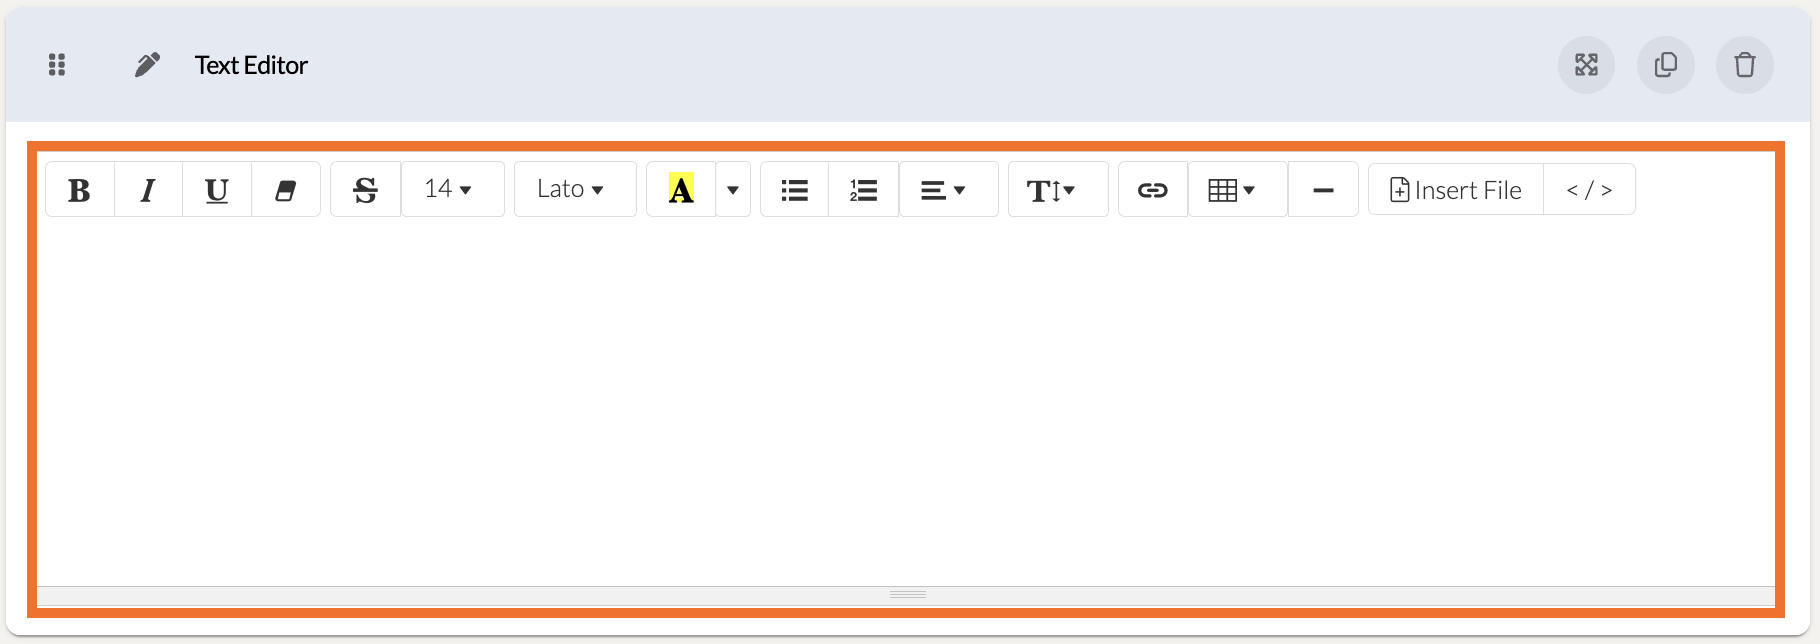
Click on the space where your text would appear to reveal the text entry space. Here you can find multiple text formatting tools that you might find in your favorite word processor! You can even insert a file to display an image with your text!
Further Reading
-
To learn more about how to establish Learning Path Completion Pathways within each module, please read this Help Center article here .
-
To learn more about how to enroll Learners and Moderators to Learning Path Modules, please read this Help Center article here .
-
To learn more about how to enroll Learners and Moderators to Learning Path Collections, please read this help Center article here .